Exercises (3161)
Einbeinstand (left) ► single leg stability balance board
Power
Individual work
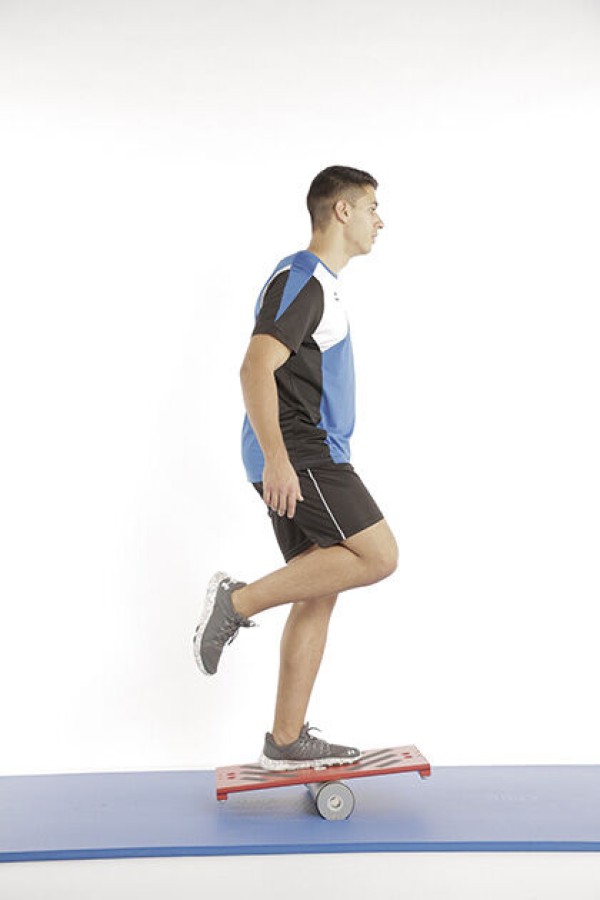
One-legged stand (left) on the balance board (board on the semicircular wedges, wide side of the board in front of the body), tilt forwards/backwards without the balance board touching the floor.
Attention:
Exercise is relatively difficult, at the beginning possibly against a wall for support or with the support of a partner.
Lighten:
Stand on the half-round wedges (without balance board); stand on the balance board with both legs.
Harden:
Balance board on the roller (instead of on the wedges).
Variant:
Tilt the narrow side of the board in front of your body, sideways, without the balance board touching the floor.
1 balance board
2 wedges (semicircular)
1 roller ► to make the exercise more difficult
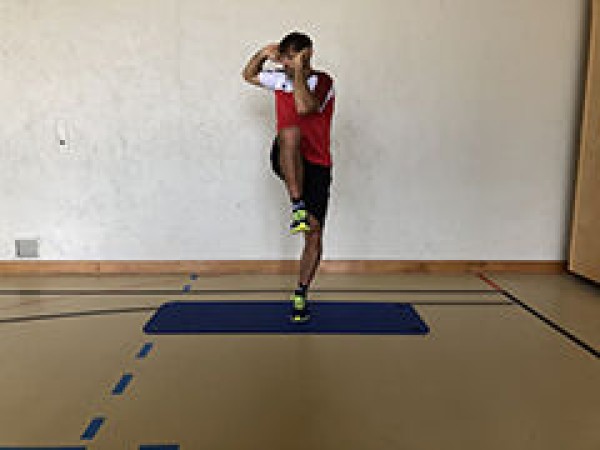
Einbeinstand (right) ► single leg stability
Power
Individual work
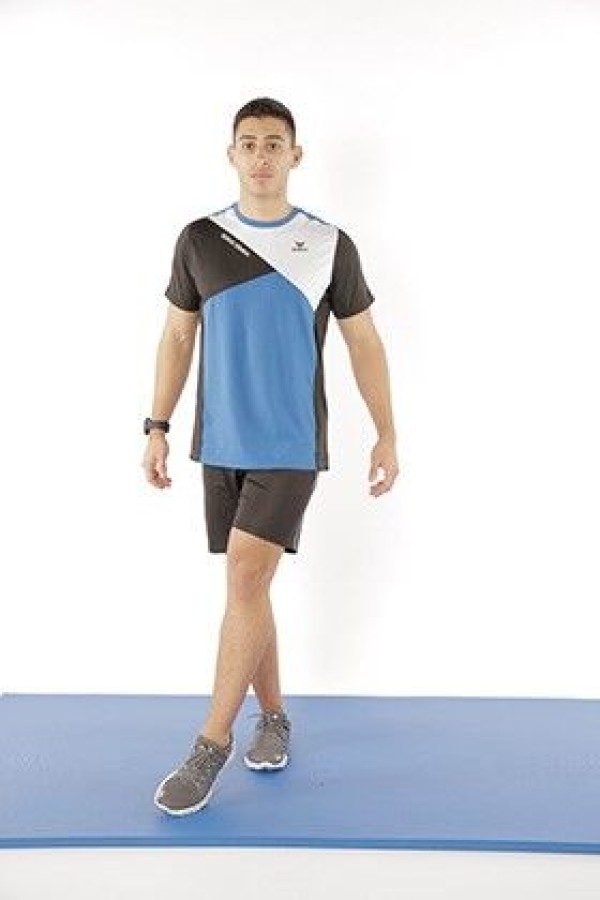
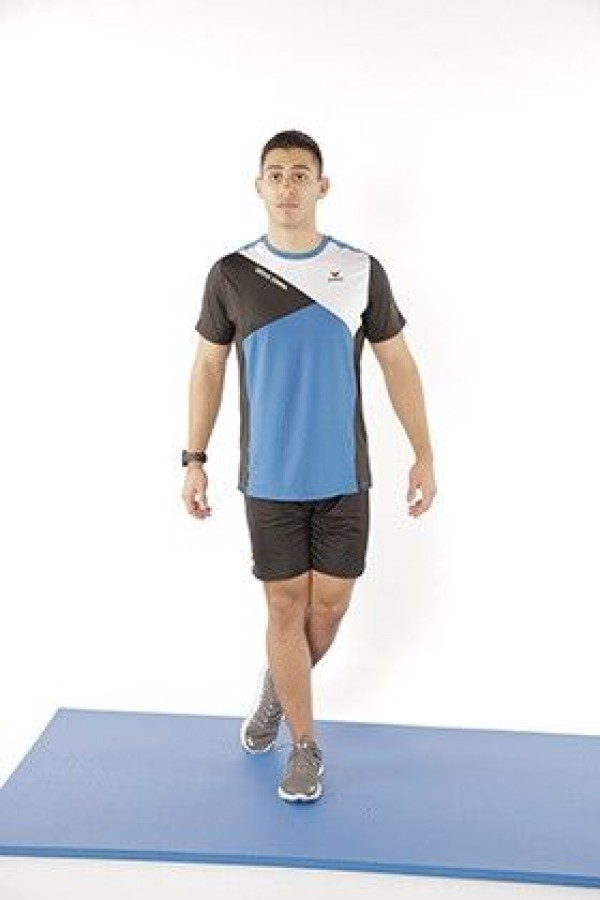
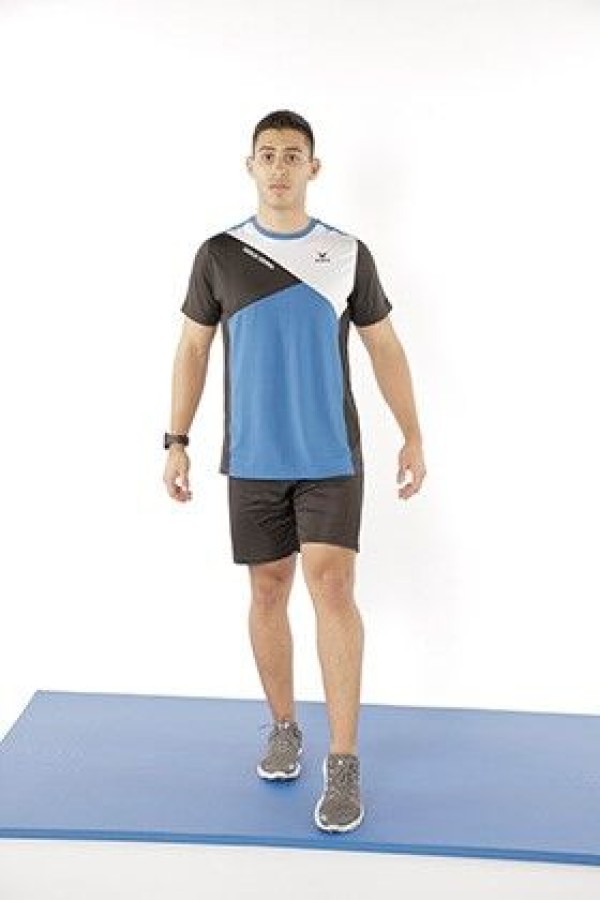
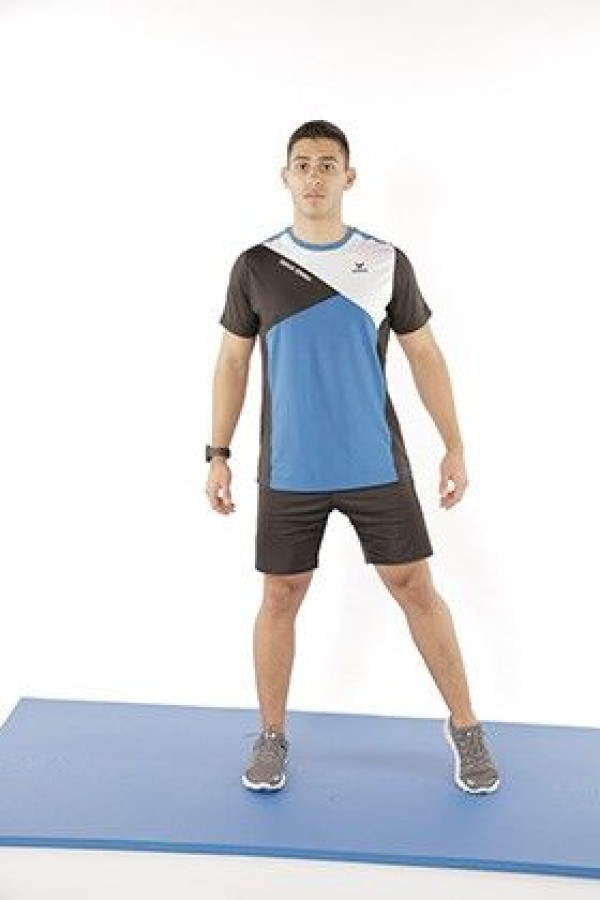
One-legged stand, standing leg (right) slightly bent, bring the other leg around the body in the shape of a pentagonal star (alternatively, only tap the corners of the star with the foot or always bring the foot to the centre in between).
Attention:
Keep the upper body upright (maintain balance).
Lighten:
Bend the supporting leg less (greater angle in the knee).
Harden:
Bend the supporting leg more (smaller angle in the knee); hold additional weight (on the leg or on the chest/shoulders, in the hands).
Variant:
Complete the exercise while jumping.
1 weight cuff/weight vest/weight disc/(medicine) ball/sandbag/fighting backpack/2 dumbbells ► make the exercise more difficult (additional weight)
Einbeinstand (right) ► single leg stability balance board
Power
Individual work
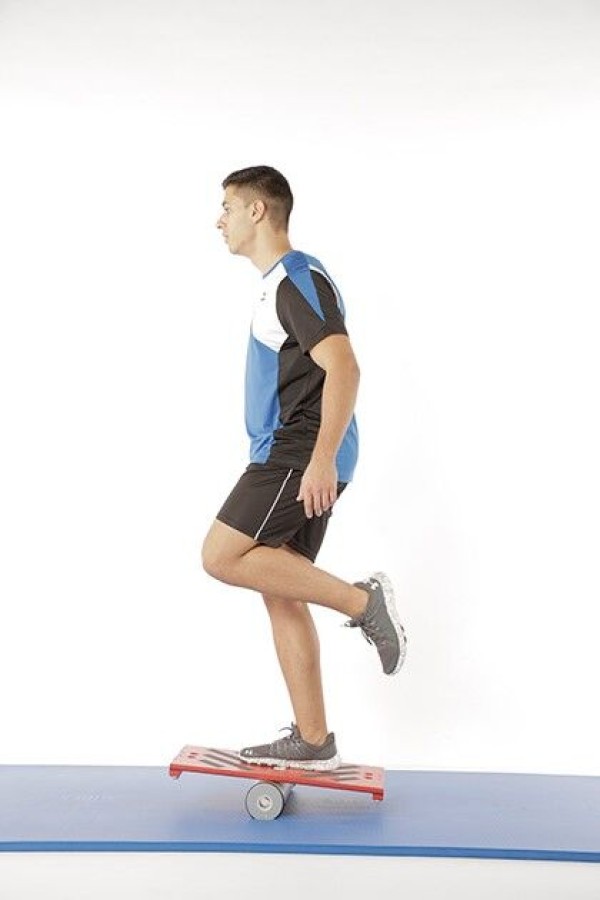
One-legged stand (right) on the balance board (board on the semicircular wedges, wide side of the board in front of the body), tilt forwards/backwards without the balance board touching the floor.
Attention:
Exercise is relatively difficult, at the beginning possibly against a wall for support or with the support of a partner.
Lighten:
Stand on the half-round wedges (without balance board); stand on the balance board with both legs.
Harden:
Balance board on the roller (instead of on the wedges).
Variant:
Tilt the narrow side of the board in front of your body, sideways, without the balance board touching the floor.
1 balance board
2 wedges (semicircular)
1 roller ► to make the exercise more difficult
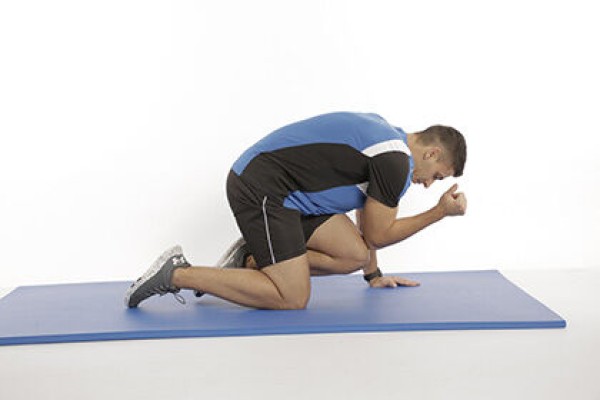
Move one arm forwards or backwards alternately while kneeling ► front raise
Power
Individual work
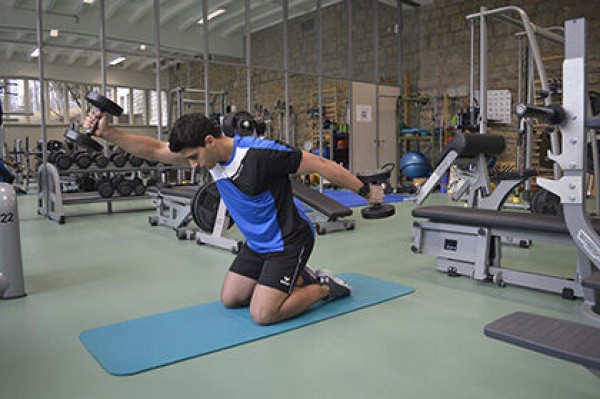
Kneeling position, buttocks raised (do not sit on your heels) and upper body leaning slightly forwards. Hold a dumbbell in each hand and alternately stretch one arm straight forwards (parallel to the floor) and one arm backwards. Change arm position directly (arms straight forwards or backwards).
Starting position:
- Kneeling, buttocks slightly raised, upper body tilted forwards
- One arm extended forwards and one backwards
- Straight back, tension in the torso (no hollow back)
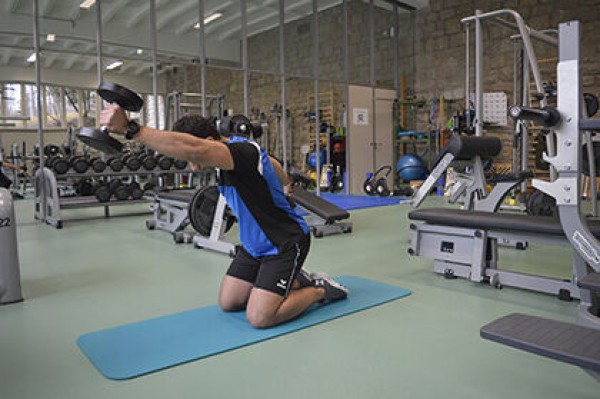
Finishing position:
- Other arm extended forwards or backwards than in the starting position. back than in the starting position
- Body position remains stable (straight back)
Variant:
Exercise performed in a standing position with the upper body leaning slightly forwards.
2 dumbbells
Introduction to HiBa in the field: playful form
Obstacle course in the terrain
The obstacle course is divided into six sectors. The first sector is assigned the number 6 and the last section the number 1. A throwing field is set up next to the obstacle course. There, throwing discs (frisbees) can be thrown at a target. The target can be a tyre lying on the ground or a tyre suspended from two paint sticks with ribbons (do not make the targets too easy, but not too difficult either). A flipchart is placed between the obstacle course and the throwing field for the evaluation.
The game works as follows: the participants throw at the targets on the throwing field. They have a maximum of six attempts. If they fail to hit a target, the participants complete a marked-out lap around the obstacle course and are then allowed six new attempts to hit the target. If a hit is scored, part or all of the obstacle course can be passed. If the hit is successful after the first attempt, all obstacles may be attempted. If the participant hits the target on the third attempt, for example, they can run through the obstacle course up to and including section three. This means that the competitor throws until the first hit (multiple hits are not possible) or, if no hits are made, an additional round must be completed as mentioned above. If the participant is successful and has passed a section or the entire obstacle course, they can then cross off the corresponding number (number of attempts until they hit the target) on the flipchart. If, under certain circumstances, the target is hit a second time with only one attempt, the entire obstacle course is available again and the participant can choose until and with which partial distance the obstacles are run in order to cross off a missing number on the flipchart. The game is over for the participants when they have ticked off the numbers 1-6 on the flipchart. The fewer throws required for a hit, the easier it is to complete the exercise. If, for example, only the number two is missing at the end, but the target has not been hit after two attempts, a running round is completed and you can then throw at the targets again. If necessary, adapt the exercise to the time conditions and finish after the first ranks if necessary.
x tyres (adjust the number of targets to the number of participants)
x colouring sticks (optional depending on the target)
x game tapes (optional depending on the target)
1 route tape
1 flipchart (evaluation prepared)
x throwing discs (frisbees)
8 fanjons
6 F-discs with pegs (numbers 1-6)
Hinbernis track in the terrain
Before each use of the HiBa terrain, the elements must be checked for their suitability and the running track must be cleaned/removed of foreign objects. Minimising the risk of injury (e.g. avenging gravel pits on the climbing wall) is the responsibility of the sports manager and has top priority.
Introduction to HiBa in the field: playful form (burning ball)
Obstacle course in the terrain
A player from team A throws a tennis ball (or if available, the ball is propelled into the field with a baseball bat and a hitting device) or a rugby ball (can also be kicked - either from the air or a team mate holds the ball, which is on the ground) into the playing field (e.g. grass pitch) for the start. The ball must cross a certain line / a defined point high (flying). After the throw, the player enters the obstacle course. Tyres are placed between the obstacles, which act as neutral zones to interrupt the run. Any number of runners may stay in the neutral zones. The team receives one point for each completed run (complete obstacle course). The points are entered on the score sheet by the respective runner after the run. The players of team B try to get the ball to the "burning point" (tyre) as quickly as possible. They are not allowed to run with the ball. Each time the ball falls to the ground (either after team A's throw or between team B's passes), the field team must alternately perform 4 push-ups, 4 trunk bends or 4 stretch jumps before the ball can be returned. If the ball is caught directly by the field team after the throw, the team receives a point, which is noted on the score sheet by the sports director. If a runner is between the obstacles (not at a hoop) at the time when the field team "burns" the ball at the designated spot, he must return to the next neutral zone. If team A has no following thrower, as all other runners are on the obstacle course, the last player of the team has to put the ball into play until a team-mate returns (has completed a run). After a certain time, the teams switch roles.
Variant I:
The basic idea remains the same as described above. One team is in the field, one team completes the obstacle course. However, all additional rules (ball must cross the line in the air and strength exercises when the ball touches the ground) are cancelled. The running team has correspondingly less time to pass the obstacles.
Variant II:
The throwing/punching/kicking team decides for itself how many runners start on a throw/kick. In contrast to the first game form, the last runner in the group is also obliged to start running after his throw/kick. If the team is "starved" as a result, a change is made.
Variant III:
If a runner finds himself between the obstacles when the sports director whistles, he must return to the start and line up in the row of throwers/bats/kickers (or drop out completely and perform additional tasks at the edge of the field). Optionally, it can be defined that only one runner is allowed per tyre.
1 flipchart
1 tennis ball/rugby ball
1 baseball bat (optional)
1 batting device (optional)
11 tyres
Off-road obstacle course
Before each use of the HiBa terrain, the elements must be checked for their suitability and the running track must be cleaned/removed of foreign objects. Minimising the risk of injury (e.g. avenging gravel pits on the climbing wall) is the responsibility of the sports manager and has the highest priority
.Introduction to HiBa in the field: tips & tricks
Obstacle course in the terrain
Present the obstacles, including tips on how to pass the obstacles as quickly as possible.
Depending on the size of the group, the participants can overcome the obstacle one by one after the presentation and practise for the first time.
Obstacle course in the terrain
Before each use of the HiBa terrain, the elements must be checked for their suitability and the course must be cleaned/removed of foreign objects. Minimising the risk of injury (e.g. avenging gravel pits on the climbing wall) is the responsibility of the sports manager and has top priority.
Introduction to HiBa in the field: Training
Obstacle course in the terrain
Single start
Next runner starts as soon as the previous runner has passed the third obstacle
All participants complete a few runs without time pressure to familiarise themselves with the obstacle course (minimise the risk of injury). Optionally, participants can complete a timed run to get an initial indication of their time with a view to a possible competition format.
3 stopwatches (optional for stopping the times)
1 flipchart/evaluation sheet (optional for noting the times)
Obstacle course in the terrain
Before each use of the HiBa terrain, the elements must be checked for their suitability and the course must be cleaned/removed of foreign objects. Minimising the risk of injury (e.g. avenging gravel pits on the climbing wall) is the responsibility of the sports manager and has top priority
Introduction to HiBa in the field: Competition training
Obstacle course in the terrain
Single start
Next runner starts as soon as the previous runner has passed the third obstacle
All participants complete at least one run for time and thus receive an initial time indication with regard to a possible competition form.
3 stopwatches
1 flipchart/evaluation sheet (optional for noting times)
Obstacle course in the terrain
Before each use of the HiBa terrain, the elements must be checked for their suitability and the course cleaned/cleared of foreign objects. Minimising the risk of injury (e.g. avenging gravel pits on the climbing wall) is the responsibility of the sports manager and has top priority
Introduction HiBa in the field: Dice game
Obstacle course in the terrain
The participant throws a number, the obstacle/obstacles are then completed according to the result:
- Double beam / crawling net
- Lion's den / ford
- Beam obstacle (triple beam) / balancing beam
- Waaght jump and crawling beam and crawling beams
- Beam stairs (bear step)
- Running lane / climbing wall
After passing the obstacle, the participant ticks off the corresponding number on a poster (flipchart). Each obstacle must be completed twice to finish the exercise. This means that a half cross (/) is noted for each participant's start number on the first pass and the cross can be completed on the second pass (x). The dice may be rolled twice. If, after the second roll, you still do not have a number that has not been rolled before, you still have to complete the obstacle again, even though it may already be ticked off (variant: run around the obstacle course or touch a specific point such as a tree). Who is the first to tick off all the numbers on the flipchart? If necessary, adapt the exercise to the time conditions and finish after the first ranks if necessary.
4 (foam) dice
1 flipchart (prepared in advance with rows number of participants and columns 1-6)
1 F-discs with pegs/post signs with numbers 1-6
Obstacle course in the terrain
Before each use of the HiBa terrain, the elements must be checked for their suitability and the course cleaned/removed of foreign objects. Minimising the risk of injury (e.g. avenging gravel pits on the climbing wall) is the responsibility of the sports manager and has the highest priority
.Introduction to HiBa in the hall: playful form (burning ball)
Obstacle course in the hall
A player from team A throws a tennis ball into the field at the start (or, if available, the ball is propelled into the field with a baseball bat and a batting device). The ball must cross a certain line high (flying). After the throw (hit), the player enters the obstacle course. Tyres are placed between the obstacles, which act as neutral zones to interrupt the run. Any number of runners may stay in the neutral zones. The team receives one point for each completed run (complete obstacle course). The points are entered on the score sheet by the respective runner after the run. The players of team B try to get the ball to the "burning point" as quickly as possible. They are not allowed to run with the ball. Each time the ball falls to the ground (either after team A's throw or between team B's passes), the field team must alternately perform 4 push-ups, 4 trunk bends or 4 stretch jumps before the ball can be returned (touched). If the ball is caught directly by the field team after the throw, the team receives a point, which is noted on the score sheet by the sports director. If a runner is between the obstacles (not at a hoop) at the time when the field team "burns" the ball at the designated spot, he must return to the next neutral zone. If team A has no following thrower, as all other runners are on the obstacle course, the last player of the team has to put the ball into play until a team-mate returns (has completed a run). After a certain time, the teams switch roles.
Variant I:
The basic idea remains the same as described above. One team is in the field, one team completes the obstacle course. However, the tennis ball is replaced with a rugby ball and all additional rules (ball must cross the line in the air and strength exercises when the ball touches the ground) are cancelled. This means that the running team has less time to pass the obstacles. At the start, the rugby ball is thrown or kicked (either from the air or by a team mate holding the ball on the ground). Once again, the aim is to complete as many laps as possible in the time available. A caught ball by the field team still scores a point.
Variant II:
The throwing/kicking team decides for itself how many runners run after a throw/kick. In contrast to the first game form, the last runner in the group is also obliged to start running after his throw/kick. If the team is "starved" as a result, a change is made.
Variant III:
If a runner finds himself between the obstacles when the sports director whistles, he must return to the start and line up in the row of throwers/bats/kickers (or drop out completely and perform additional tasks at the edge of the field). Optionally, it can be defined that only one runner is allowed per tyre.
11 stakes
11 soft mats (small)
1 soft mat (large)
3 vaulting boxes
3 long benches
1 parallel bars
2 horses
1 flipchart
1 whistle
1 tennis ball
1 baseball bat (optional)
1 batting device (optional)
6 hoops
1 rugby ball ► Variation of the exercise
Introduction to HiBa in the hall: tips & tricks
Obstacle course in the hall
Present the obstacles, including tips on how to pass the obstacles as quickly as possible.
Depending on the size of the group, the participants can overcome the obstacle one by one after the presentation and practise for the first time.
11 stakes
10 soft mats (small)
1 soft mat (large)
3 vaulting boxes
3 long benches
1 parallel bars
2 horses
Introduction HiBa in the hall: training
Obstacle course in the hall
Single start
Next runner starts as soon as the previous runner has passed the third obstacle
The obstacle course in the hall is set up in the specified standard size (volleyball court). All participants complete a few runs without time pressure to familiarise themselves with the obstacle course (minimise the risk of injury). As an option, participants can complete a timed run to get an initial indication of their time with a view to a possible competition format.
11 stakes
10 soft mats (small)
1 soft mat (large)
3 vaulting boxes
3 long benches
1 parallel bars
2 horses
3 stopwatches (optional to stop the times)
1 flipchart/evaluation sheet (optional to note the times)
Introduction to HiBa in the hall: competition training
Obstacle course in the hall
Single start
Next runner starts as soon as the previous runner has passed the third obstacle
The obstacle course in the hall is set up in the specified standard size (volleyball court). All participants complete at least one run for time and thus receive an initial time indication with regard to a possible competition form.
11 stakes
10 soft mats (small)
1 soft mat (large)
3 vaulting boxes
3 long benches
1 parallel bars
2 horses
3 stopwatches
1 flipchart/evaluation sheet (optional for recording times)
Introduction HiBa in the hall: dice game
Obstacle course in the hall
The participant throws a number and then completes the obstacle(s) according to the result:
Roll forwards and slalom around colouring sticks
Crawling under and jumping over the Swedish box elements
Balancing over the narrow side of the long bench
Climbing under/over the bar
Jumping over the horses
Crawling under and jumping over the horses
Jumping over the horses
Jumping over the horses
Crawling under and
Jumping over the horses (Swedish boxes)
Crawling under the large soft mat
After passing the obstacle, the participant ticks off the corresponding number on a poster (flipchart). Each obstacle must be completed twice to finish the exercise. This means that a half cross (/) is noted for each participant's start number on the first pass and the cross can be completed on the second pass (x). The dice may be rolled twice. If, after the second throw, you still do not have a number that has not been thrown before, you still have to complete the obstacle again, even though it may already be ticked off (variant: run around the obstacle course or touch a wall). Who is the first to tick off all the numbers on the flipchart? If necessary, adapt the exercise to the time conditions and finish after the first ranks if necessary.
11 stakes
10 soft mats (small)
1 soft mat (large)
3 vaulting boxes
3 long benches
1 parallel bars
2 horses
4 (foam) dice
1 flipchart (prepared in advance with rows number of participants and columns 1-6)
Introduction to rope climbing technique
Climbing
Demonstration of the rope climbing technique by the instructor:
- For the S-wrap technique, grab the rope as high up as possible with your hands (close together), keeping the rope between your thighs. Now wrap the rope around the weak leg. The rope practically runs once around the calf and finally over the foot further down (S-shape). With the other (strong) foot, step on the rope that has been placed on the weak foot and lock it. Support yourself with the tips of your toes to grab the rope again with your hands (one after the other), preferably at the highest point. Now let go of the rope with the foot clamp grip and pull your legs upwards so that your knees and elbows are almost at the same height. You can then lock the rope again with your feet as described above.
- For the J-hook technique, you stand next to the rope at the start. Here too, you then grab the rope as high as possible. Your hands are close together to stabilise your entire body. Now pull your leg up to your chest with the rope running to the left of your body. With your right foot, grab the rope under your left foot and place it on your left foot to secure it. This creates an angle of over 90 degrees in the rope (J-shape). Once the rope is fixed to the foot, reach up again with your hands one at a time and the process starts all over again (you can switch sides).
1 climbing rope
1-2 soft mats (large)
Introduction to climbing technique on the pole
Climbing
Demonstration of the climbing technique on the pole by the sports leader:
- Press the instep of the back leg and the sole of the front leg against the pole.
- Press both soles of the feet against the pole.
1 climbing pole
2-6 soft mats (small)
Einstein
Light-Contact
Partner work
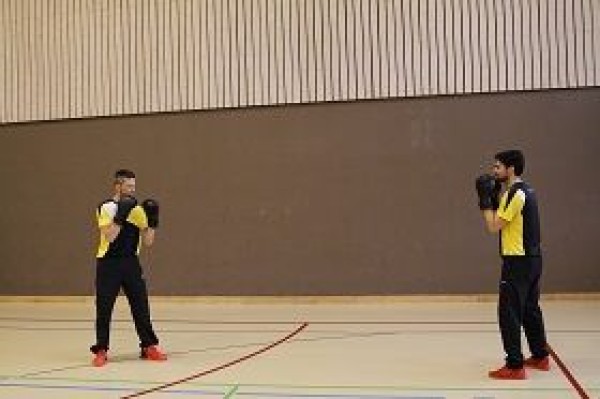
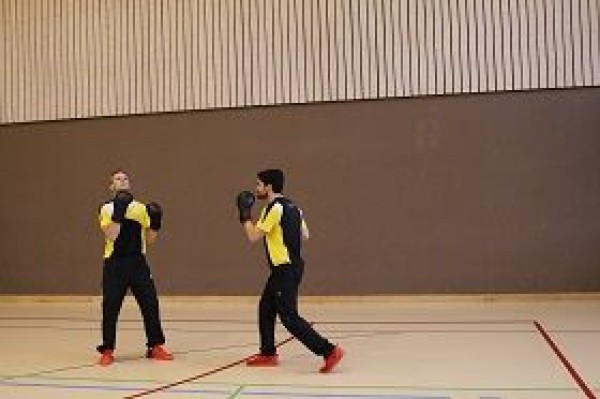
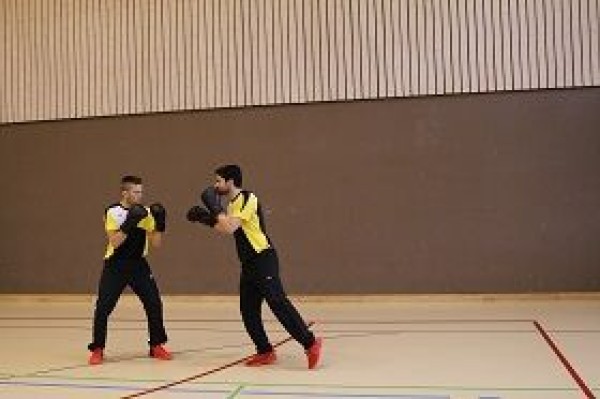
Two participants stand on two lines about 5 metres apart. One participant calls out an addition with two-digit numbers (e.g. "34 plus 23") and then runs to their opponent to score a hit. If he scores before the attacked player can complete the task, he receives one point. The defender receives a point if he states the result before he is hit. In the next round, the roles are swapped. Who has scored a certain number of points first or has scored more points after a certain time?
Variant:
Only shoulder and torso hits are counted.
Participant:
1 pair of boxing gloves
Move your elbows backwards while standing
Power
Individual work
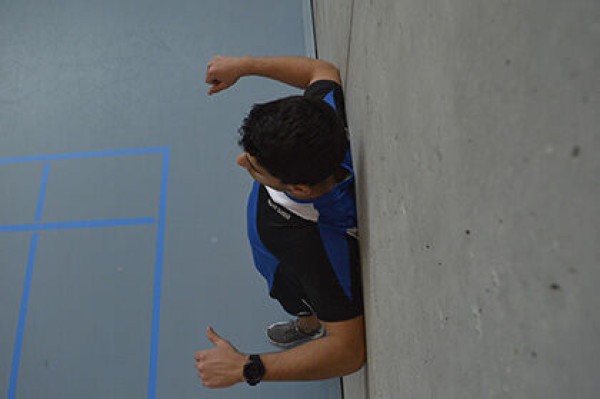
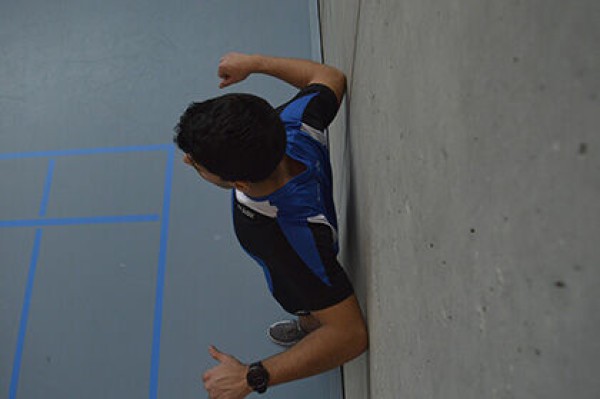
Stand leaning diagonally against the wall (back against the wall), arms bent at the side at shoulder height (hands facing forwards), push your elbows back (upper body away from the wall) and return to the starting position.
Attention:
Do not rest your shoulder blades completely on the wall.
Lighten:
Stand upright.
Harden:
Foot further away from the wall (increase the incline).
1 wall
Move your elbows forwards while standing
Power
Individual work
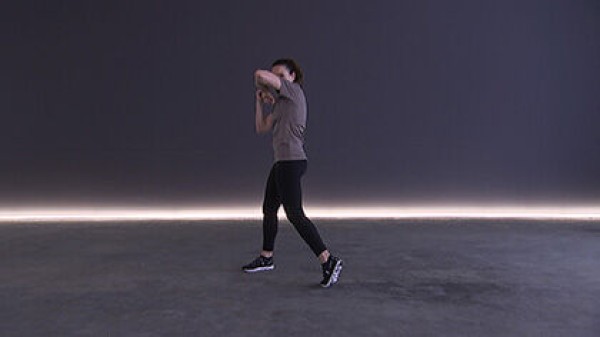
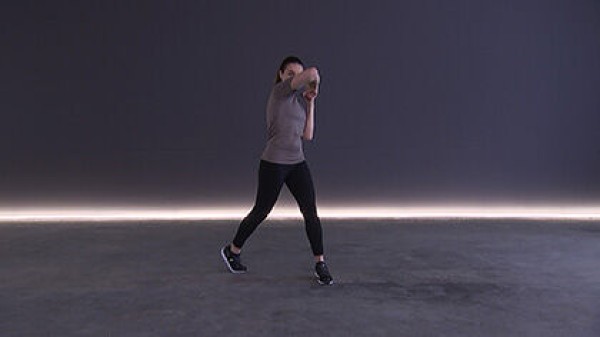
A distinction is made between the left-handed and right-handed stance. Right-handers take the left stance (left foot in front), while left-handers take the right stance (right foot in front). The left-hand stance: The left foot is placed one step forwards from a parallel stance approximately shoulder-width apart so that the right hand is behind. The right hand corresponds to the striking hand, the left hand to the leading hand. The distance between the two feet is approximately one shoulder width, with the feet on a diagonal to each other. The front foot stands on the entire sole, the heel of the back foot is raised. Both feet point forwards and the weight is evenly distributed over both legs. The front shoulder is turned slightly inwards. The whole body is slightly crouched, the knees are slightly bent and soft. The striking hand is placed in front of the chin and rests against the body. The lead hand is in front at eye level. The fists point outwards with the back. The arms are in front of the body and the elbows point downwards so that the arms cover the body. Alternate between bringing one elbow forwards at eye level (pointing forwards/upper arm in the direction of your gaze) and turning your upper body with it.
Attention:
Always hold your arms up (chin or eye level).
Lighten:
Lower your elbows forward (chest height).
Harden:
Hold additional weight on your arms or in your hands.
2 weight cuffs/weight balls/dumbbells ► make the exercise more difficult (additional weight)
Bring elbows and knees together crosswise while seated alternating ► rotational crunch
Power
Individual work
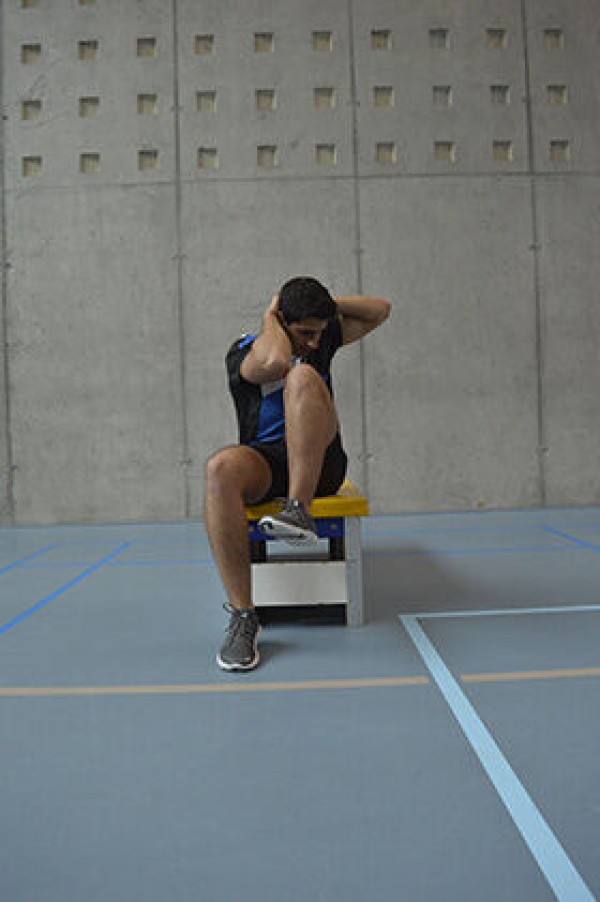
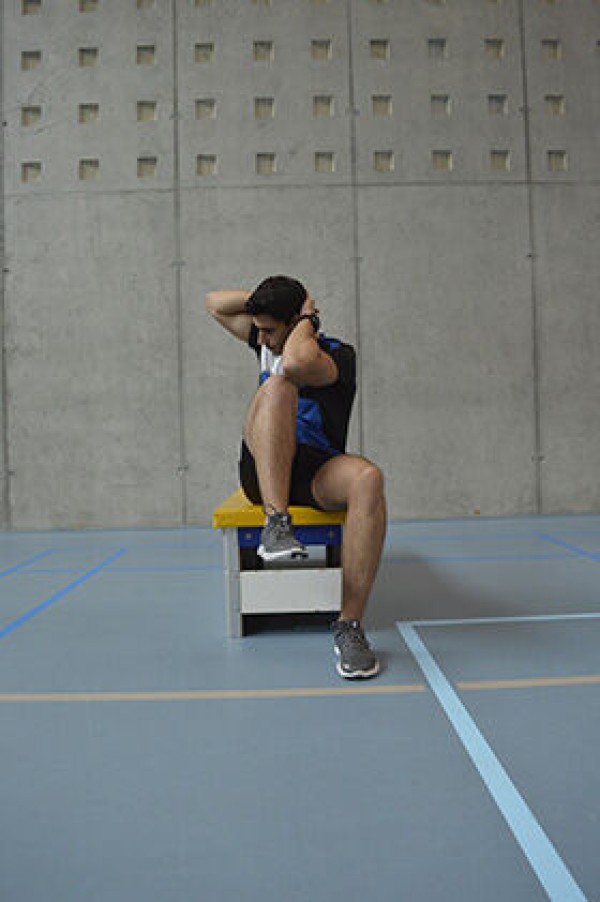
Sit upright on the Swedish box (or a long bench), place your arms bent next to your head (hands on the back of your neck), bring your elbows and knees together by lifting each leg and lowering your upper body crosswise in front of your stomach. Switch sides after each exercise.
Attention:
Do not fold your elbows together/bring them in front of your face.
Lighten:
Do not bring your elbows and knees fully together.
Harden:
Add weight to your legs.
2-3 vaulting box elements (incl. top section) or 1 long bench
2 weight cuffs ► to make the exercise more difficult (additional weight)
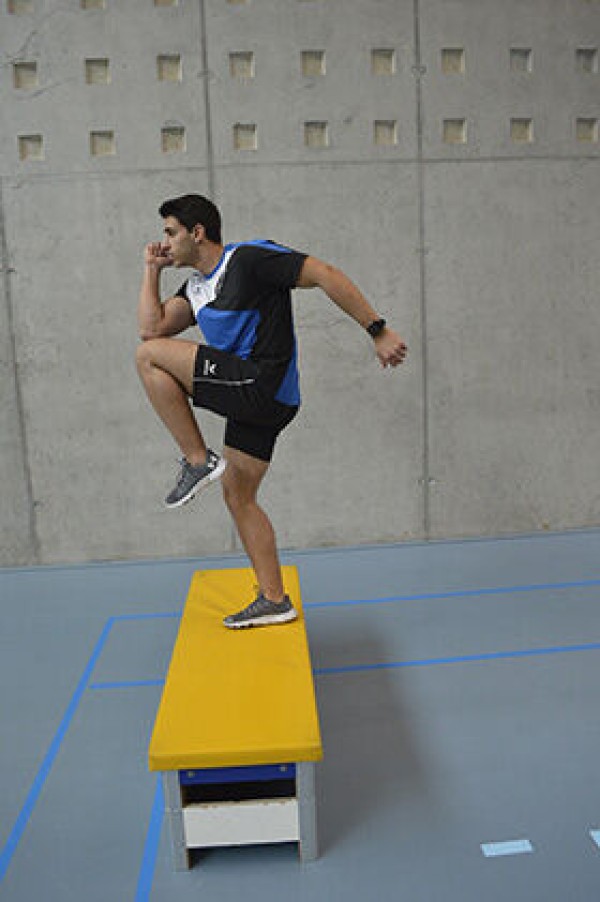
Bring your elbows and knees together crosswise while standing (left) ► step up
Power
Individual work


Stand on one leg in front of the swinging box elements/long bench (left), place the other (right) leg on the top of the swinging box/long bench, step onto the box element/long bench and simultaneously bring the knee of the swinging leg together with the opposite elbow crosswise, then return directly to the starting position.
Attention:
Keep your back straight, keep the knee of the supporting leg centred over the foot (do not bend forwards).
Lighten:
Lower element (upper part of the swinging box only) or no element at all.
Harden:
Additional weight on the feet, higher element.
2 vaulting box elements (incl. top section) or 1 long bench
2 weight cuffs ► make the exercise more difficult (additional weight)
1-2 additional box elements ► make the exercise more difficult (position)
Bring elbows and knees together crosswise while standing (right) ► step up
Power
Individual work

Stand on one leg in front of the swinging box elements/long bench (right), place the other (left) leg on the top of the swinging box element/long bench, step onto the box element/long bench and simultaneously bring the knee of the swinging leg together with the opposite elbow crosswise, then return directly to the starting position.
Attention:
Keep your back straight, keep the knee of the supporting leg centred over the foot (do not bend forwards).
Lighten:
Lower element (upper part of the swinging box only) or no element at all.
Harden:
Additional weight on the feet, higher element.
2 vaulting box elements (incl. top section) or 1 long bench
2 weight cuffs ► make the exercise more difficult (additional weight)
1-2 additional box elements ► make the exercise more difficult (position)
Bring elbow and knee together crosswise in standing position alternating ► knee to elbow
Power
Individual work
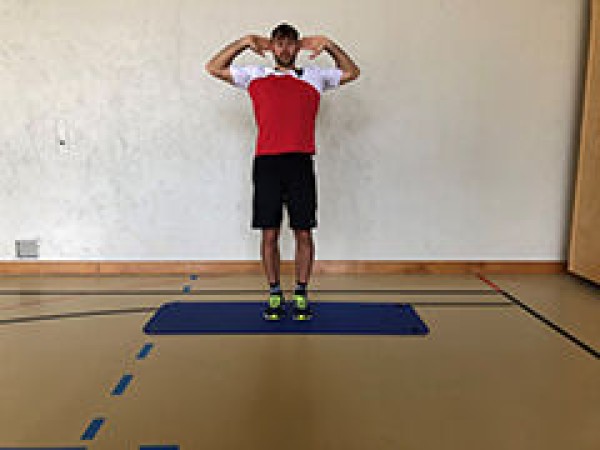
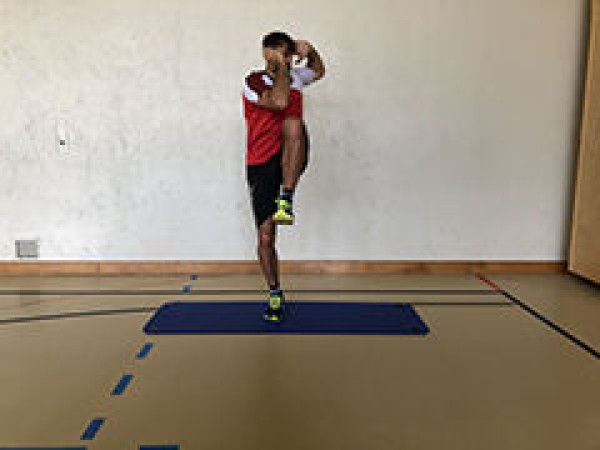
With your arms bent and hands locked behind your head (elbows pointing to the side), bend one leg and lift it up while rotating your upper body to move the elbow crosswise to the raised knee (upper body remains upright). Then return to the starting position and perform the exercise with the other arm and leg.
Lighten:
Lift the leg less high (without bringing the elbow and knee together).
Harden:
Add weight to the feet.
2 weight cuffs ► make the exercise more difficult (additional weight)
Bring elbows and knees together crosswise in four-footed stance alternating ► quadruped reach
Power
Individual work
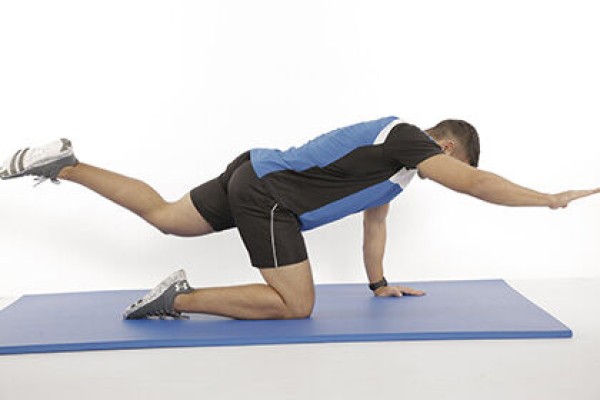
Stand on four feet, stretch one arm and one leg crosswise, bring knees and elbows together under the body (approximately chest height) and return to the starting position (without lowering). Switch sides after each exercise.
Attention:
Head, torso, hips and leg (and outstretched arm) form roughly one line.
Lighten:
Do not raise arms and legs to a horizontal position.
Harden:
Hold additional weight on the legs/arms and/or in the hands.
2-4 weight cuffs/2 weight balls/dumbbells ► make the exercise more difficult (additional weight)