Exercises (3161)
Indiaca: Trench game
Forms of play / exercises
2 teams of 2-4 players each
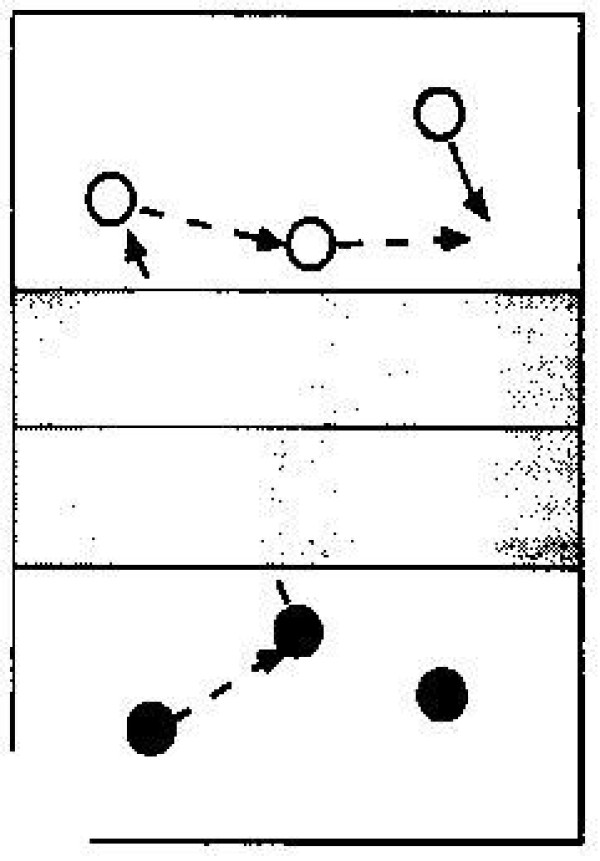
Two teams of 2-4 players play Indiaca against each other. However, the ball must not fall to the ground before the attack line (3m line). The aim is to keep the rally going for as long as possible. The Indiaca must always be touched by two players of a team before it can be played over the net.
Aim: Fast movement; communication; precision.
Variant:
After each touch of the ball, a push-up must be completed.
1 (volleyball) net
Pitch:
1 Indiaca pad
Indiaca: Joker-Spiel
Forms of play / exercises
2 Teams

Two teams play normal Indiaca against each other. In this game variant, however, both teams appoint a joker before each service (marked by a ribbon/cap etc.). If the joker scores a point, it counts double.
Objective: Focus on a specific player.
Variant:
If one of the jokers is successful, both teams swap teams.
1 (volleyball) net
Pitch:
1 Indiaca pad
1 game ribbon / cover
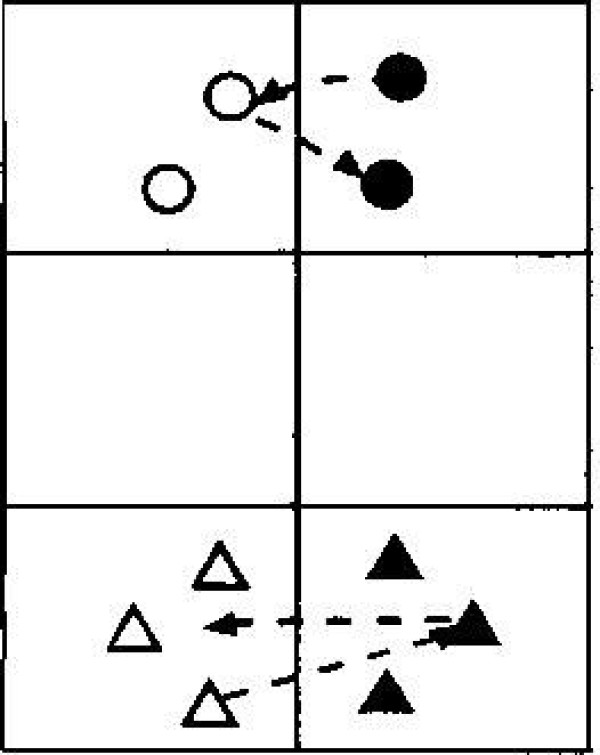
Indiaca: Pad passen
Forms of play / exercises
Groups of 2
Two players stand opposite each other on both sides of the net and pass the Indiaca pad to each other (or also possible without a net; possibly define playing fields and a restricted area in the centre zone using lines). The aim is to play with the stronger hand as well as the weaker hand.
1 (volleyball) net
Per group:
1 Indiaca pad
Indiaca: Pad over the string
Forms of play / exercises
2 teams of 2-4 players each
Two teams of 2-3 players each play an Indiaca over the net into the opponent's court in such a way that it is not possible for the opponent to catch it. A point is scored when the Indiaca falls to the ground in the opponent's court. If the Indiaca can be caught, it must be thrown back from the same point.
Objective: Fast movement; communication; precision.
Variant 2:2:
After each throw, an additional task must be completed, e.g. touching the baseline, a lie.e.g. touch the baseline, do a push-up, etc.
Variant 3:3:
Play with 2 Indiacas; additional tasks may be required.
1 (volleyball) net
Pitch:
1 Indiaca pad
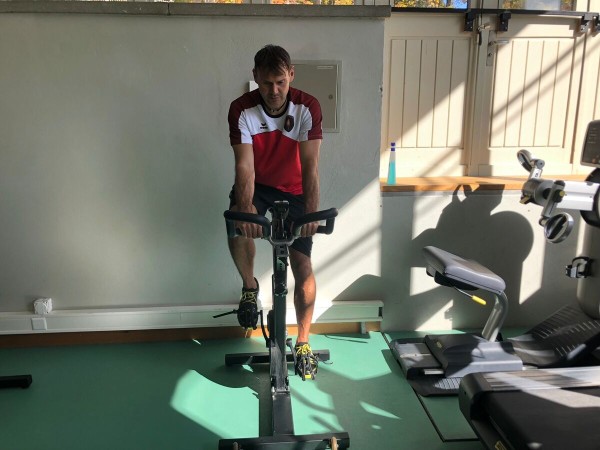
Indoor cycling
Stimulate circulation
Individual work
Indoor cycling involves cycling indoors, whereby the workout on the indoor bike is even slightly more efficient than cycling outside. Whether for burning fat, strengthening the cardiovascular system, ergo for health or for the muscles, training with the indoor bike offers a holistic workout and entails hardly any risks. At a moderate speed with correspondingly low resistance, indoor cycling is an ideal way to stimulate the circulatory system during the run-in.
1 Fahrradergometer/Indoor-Bike/Spinning-Bike
Indoor cycling
Increase pulse
Individual work
Indoor cycling involves cycling indoors, whereby the workout on the indoor bike is even slightly more efficient than cycling outside. Whether for burning fat, strengthening the cardiovascular system, ergo for health or for the muscles, training with the indoor bike offers a holistic workout and entails hardly any risks. This holistic workout makes indoor cycling ideal for getting the heart rate up at the end of the warm-up. A high basic speed can be selected or constant changes of pace provide the necessary intensity.
1 Fahrradergometer/Indoor-Bike/Spinning-Bike
Indoor cycling
Power
Individual work
Indoor cycling involves cycling indoors, whereby the workout on the indoor bike is even slightly more efficient than cycling outside. Whether for burning fat, strengthening the cardiovascular system, ergo for health or for the muscles, training with the indoor bike offers a holistic workout and entails hardly any risks.
Variant:
Choose a constant basic speed or vary the intensity by constantly changing speed (interval training).
1 Fahrradergometer/Indoor-Bike/Spinning-Bike
Indoor Cycling (m: 10000m/10km - 240kal; w: 8000m/8km - 180kal)
Power
Individual work

Indoor cycling involves cycling indoors, whereby the workout on the indoor bike is even slightly more efficient than cycling outside. Whether for burning fat, strengthening the cardiovascular system, ergo for health or for the muscles, training with the indoor bike offers a holistic workout and entails hardly any risks.
Variant:
Choose a constant basic speed or vary the intensity by constantly changing speed (interval training).
1 Fahrradergometer/Indoor-Bike/Spinning-Bike
Indoor Cycling (m: 1000m/1km - 24kal; w: 800m - 18kal)
Power
Individual work

Indoor cycling involves cycling indoors, whereby the workout on the indoor bike is even slightly more efficient than cycling outside. Whether for burning fat, strengthening the cardiovascular system, ergo for health or for the muscles, training with the indoor bike offers a holistic workout and entails hardly any risks.
Variant:
Choose a constant basic speed or vary the intensity by constantly changing speed (interval training).
1 Fahrradergometer/Indoor-Bike/Spinning-Bike
Indoor Cycling (m: 1600m/1.6km/1 mile - 36kal; w: 1200m/1.2km - 27kal)
Power
Individual work

Indoor cycling involves cycling indoors, whereby the workout on the indoor bike is even slightly more efficient than cycling outside. Whether for burning fat, strengthening the cardiovascular system, ergo for health or for the muscles, training with the indoor bike offers a holistic workout and entails hardly any risks.
Variant:
Choose a constant basic speed or vary the intensity by constantly changing speed (interval training).
1 Fahrradergometer/Indoor-Bike/Spinning-Bike
Indoor Cycling (m: 2000m/2km - 48kal; w: 1600m/1.6km - 36kal)
Power
Individual work

Indoor cycling involves cycling indoors, whereby the workout on the indoor bike is even slightly more efficient than cycling outside. Whether for burning fat, strengthening the cardiovascular system, ergo for health or for the muscles, training with the indoor bike offers a holistic workout and entails hardly any risks.
Variant:
Choose a constant basic speed or vary the intensity by constantly changing speed (interval training).
1 Fahrradergometer/Indoor-Bike/Spinning-Bike
Indoor Cycling (m: 2500m/2.5km - 60kal; w: 2000m/2km - 45kal)
Power
Individual work

Indoor cycling involves cycling indoors, whereby the workout on the indoor bike is even slightly more efficient than cycling outside. Whether for burning fat, strengthening the cardiovascular system, ergo for health or for the muscles, training with the indoor bike offers a holistic workout and entails hardly any risks.
Variant:
Choose a constant basic speed or vary the intensity by constantly changing speed (interval training).
1 Fahrradergometer/Indoor-Bike/Spinning-Bike
Indoor Cycling (m: 250m - 6kal; w: 200m - 4kal)
Power
Individual work

Indoor cycling involves cycling indoors, whereby the workout on the indoor bike is even slightly more efficient than cycling outside. Whether for burning fat, strengthening the cardiovascular system, ergo for health or for the muscles, training with the indoor bike offers a holistic workout and entails hardly any risks.
Variant:
Choose a constant basic speed or vary the intensity by constantly changing speed (interval training).
1 Fahrradergometer/Indoor-Bike/Spinning-Bike
Indoor Cycling (m: 4000m/4km - 96kal; w: 3200m/3.2km/2 Meile - 72kal)
Power
Individual work

Indoor cycling involves cycling indoors, whereby the workout on the indoor bike is even slightly more efficient than cycling outside. Whether for burning fat, strengthening the cardiovascular system, ergo for health or for the muscles, training with the indoor bike offers a holistic workout and entails hardly any risks.
Variant:
Choose a constant basic speed or vary the intensity by constantly changing speed (interval training).
1 Fahrradergometer/Indoor-Bike/Spinning-Bike
Indoor Cycling (m: 500m - 12kal; w: 400m - 9kal)
Power
Individual work

Indoor cycling involves cycling indoors, whereby the workout on the indoor bike is even slightly more efficient than cycling outside. Whether for burning fat, strengthening the cardiovascular system, ergo for health or for the muscles, training with the indoor bike offers a holistic workout and entails hardly any risks.
Variant:
Choose a constant basic speed or vary the intensity by constantly changing speed (interval training).
1 Fahrradergometer/Indoor-Bike/Spinning-Bike
Indoor Cycling (m: 750m - 18kal; w: 600m - 14kal)
Power
Individual work

Indoor cycling involves cycling indoors, whereby the workout on the indoor bike is even slightly more efficient than cycling outside. Whether for burning fat, strengthening the cardiovascular system, ergo for health or for the muscles, training with the indoor bike offers a holistic workout and entails hardly any risks.
Variant:
Choose a constant basic speed or vary the intensity by constantly changing speed (interval training).
1 Fahrradergometer/Indoor-Bike/Spinning-Bike
Info: General training principles
Introduction/Info
Methodical training principles, also known as training principles, are guiding principles that apply to all sporting activities. Those who plan their training independently and do not follow fixed training plans should adhere to the following training principles:
Training stimulus:
The training stimulus must exceed a certain threshold. The required level of stimulus depends on the training status of the respective athlete. This means that a certain stimulus does not have the same effect for every person. For example, a competitive athlete needs a greater stimulus to make progress than a healthy athlete.
Individualised load:
The training must be tailored to the individual needs and the mental and physical requirements of the person training. Factors include age, gender and training condition. The limits of endurance must be respected without compromise.
Increasing load:
Over time, training stimuli that remain the same only have a maintaining effect. If you want to increase your performance, the load must also be increased so that the body continues to be stimulated to adapt.
Right load sequence:
If several coordinative-technical and conditioning skills are trained in one training session, you should pay attention to the correct sequence.
Coordination, technique and speed training takes place in a recovered state, immediately after the warm-up. Strength training is then carried out before any endurance training, followed by a cool-down and any stretching.
Varying loads:
Similar training stimuli lose their effect over time. This is why training loads must be varied systematically and according to plan. Monotony for the psyche and monotony for the organs should be avoided. Variation can be achieved by changing the intensity (weight), the volume (sets) and the choice of exercises.
Varying loads:
Different forms such as strength, endurance or coordination training place different loads on the body, which is why the focus should not be on just one area.
Avoiding imbalances:
Muscular imbalances are defined as increased muscle shortening and/or muscle weakening between the agonist (player) and antagonist (opponent) due to one-sided strength development with simultaneous neglect of their ability to stretch. They are caused by a lack or absence of physical exertion and one-sided strain during sport or in everyday life. Insufficient regeneration and incorrect execution of movements can also lead to injuries to the musculoskeletal system.
Optimal ratio of strain and recovery:
Regeneration is just as important as strain. Regenerative measures must be planned and implemented just as carefully as training. It is important to bear in mind that regeneration processes are also influenced by psychological and emotional factors.
Continuous exercise:
Regular training develops performance potential. As a general rule, it is better to train for a shorter period several times a week than just once and for a very long time. Interruptions to training that do not serve the purpose of targeted regeneration usually lead to a reduction in performance.
Different adaptation times:
The different regeneration and adaptation processes require different amounts of time. Functional adaptations occur faster than structural ones. For example, the musculature adapts more quickly than the passive parts of the musculoskeletal system (e.g. tendons or bones of the skeleton).
1 flipchart with the general training principles (optional)
Info: FlowFit
Introduction/Info
FlowFit - complete exercise sequence (film)
FlowFit is a sequence of 7 exercises, whereby a squat is always performed first to get into the starting position in a deep squat before one of the exercises is performed afterwards. The flowing sequence of exercises fits perfectly into the run-in to mobilise the joints and stretches the various muscle groups dynamically. The aim is to improve mobility/stability, which is why the quality of the execution of the movement plays a central role. It is therefore not at all about completing the exercises as quickly as possible. The exercise sequence can be repeated as often as required (e.g. how many repetitions can be completed within a certain time limit - but make sure that the quality of the movements does not suffer). The individual exercises can also be performed several times in succession for training purposes.
1 flipchart with a sketch of the exercise
Info: forms of endurance
Introduction/Info
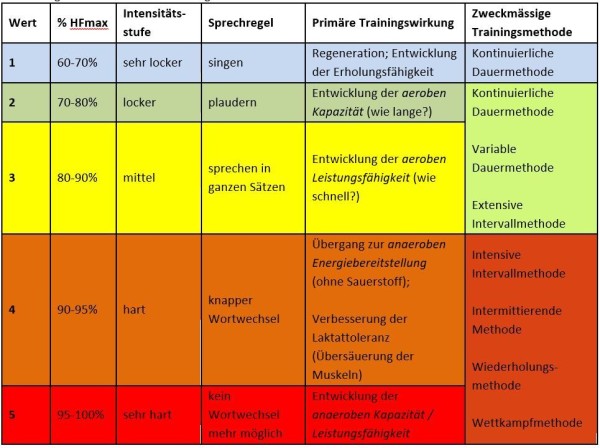
Introduction to running with the help of the table on the forms of endurance:
(see appendix/graphic)
Depending on the desired training effect, different intensity levels can be used in endurance training. Various training methods are used for this purpose.
1 poster with the endurance forms
Info: Principles of running training
Introduction/Info
Breathing:
Regular natural breathing in rhythm with the running movement improves cardiovascular activity (endurance). Please note:
- The body regulates its oxygen requirements automatically. Breathing adapts automatically to the walking rhythm. During exertion, the body gets the air it needs by breathing faster. A "forced" breathing rhythm should therefore be avoided.
- Breathe in through the nose and out through the mouth.
- Pay particular attention to deep, complete exhalation. This ensures improved exhalation of carbon dioxide (abdominal breathing).
Overexertion:
Overexertion should be avoided at all costs. It is important to interpret the body's signals correctly and deal with them. Never run faster than an increase in performance of at least 10% is possible at any time. A good training effect is achieved if you train regularly (e.g. 3-4 x 30 minutes per week). Only one, longer training session per week is less recommended, as it could lead to overexertion and have a counterproductive effect.
Pulse control:
The following rule of thumb applies to the normal amateur athlete:
Training pulse = 220 minus age, 70-85% of which (= pulse target zone)
So, for example, a runner with a pulse of 20 years must train with a pulse of at least 220.For example, a runner aged 20 who wants to improve their fitness level must train between 140 and 170 heart rate beats.
To check endurance capacity, the difference between the training heart rate and the recovery heart rate (immediately two minutes after the end of training) should be measured. Differences of 60 or more beats indicate a very good level of endurance. Note: "The higher the performance heart rate, the greater the difference in heart rate should be".
Side stitch:
Side stitch is not a disease. Occasionally, you feel a stitch-like discomfort on the left or right side of the abdominal area just a few minutes after starting to run. The actual causes of this common phenomenon are still not exactly known. Some studies suggest that this may be a purely mechanical cause. The connective tissue that supports the abdominal organs is under much greater strain after a meal. Physical activity at this time can cause small tissue tears and bleeding. Other explanations include insufficient oxygen supply to the diaphragm or pain caused by blood redistribution in the spleen or liver.
Possible measures to prevent side stitches may include:
- Training the abdominal muscles; weak abdominal muscles increase the risk of side stitches.
- No solid food intake (1-2 hours) before training or competition. Liquid food (non-carbonated) or very easily digestible food is recommended.
Possible measures for side stitches:
- Interrupt training and press inhaled air into the lungs for 5-10 seconds in a crouching position (repeat the process several times).
- Continue running at a reduced pace and change your breathing rhythm until the pain has disappeared.
1 flipchart with the principles of running training (optional)
Info: Running style analysis
Introduction/Info
Running style analysis:
With sport, you don't necessarily live longer, but you do feel young and fit for longer. Sport should ultimately help to improve quality of life and successfully counteract the millennial problem of "lack of exercise".
Running is one of the most popular sports in Switzerland. More than 500 fun runs are organised every year and the number of participants is constantly increasing.
Although a small child masters its first attempts at walking at around one year of age, running must be learned. Every person walks as individually as they look. The muscles, tendons and ligaments have become accustomed to the individual running load over the years. A change in running style takes a lot of time, as ligaments and tendons adapt to a new load situation much more slowly than the muscles. Biomechanists therefore do not recommend one-sided running that only focusses on one running style. It is important to vary the running style and adapt it to the running pace and terrain. Varying your running style can prevent annoying overloads.
Firstly, a running style analysis differentiates between the area of the foot that first makes contact with the ground. A basic distinction can be made between heel, midfoot and forefoot running. From a biomechanical perspective, all three running style techniques have both advantages and disadvantages.
The rearfoot runner:
Rearfoot running (heel running) is the most common form of running style for longer endurance activities. In this running style, the runner touches down on the outer edge of the heel. The orthopaedic load is higher than with forefoot running (bunion running) due to the force transmission of the joints. The spring effect is lower. Running shoes compensate for this by increasing the cushioning behaviour in the heel area. This results in a rolling behaviour over the midfoot and an impact from the ball of the foot. The rolling behaviour usually involves a slight inward rotation (pronation) of the foot. This running style is an energy-saving running style.
The metatarsal runner:
This running style involves an overstrike over the entire outer edge of the foot. It is a kind of compromise between the forefoot runner and the heel runner. The rolling behaviour is lower compared to the heel runner. The footprint is made by the ball of the foot. The risk of overpronation is particularly high, but the strain on the joints is less than with rearfoot runners. This style is becoming increasingly popular. Its advantage lies in the fact that the impact load on the midfoot is the lowest. This reduces the susceptibility of the Achilles tendon, ankle, knee and hip joints to injury.
The forefoot runner:
The forefoot runner usually strikes with the toes and balls of the foot when running. The impact hardness is higher than the normal rolling behaviour of the foot. However, the spring effect is increased. Running on the forefoot enables high running speeds and is therefore used by sprinters and mountain runners. The strain on the calf muscles and Achilles tendon is particularly high. As the entire foot is not rolled over, the risk of overpronation is very low. This running style alone is not suitable for continuous strain.
-> running style techniques demonstrated by the sports director
-> optional: imitation by participants; complete a short distance (adjust time required)
Another way of analysing running style is to look at the foot after it leaves the ground (footprint phase). A distinction is made between normal pronators, overpronators or supinators (underpronators):
Normal pronation:
Pronation (outward rotation) corresponds to the healthy anatomy of the foot when jogging. The foot touches down on the outer edge of the heel or midfoot. The foot strikes over the inside of the ball of the foot. In pronation, the outer edge of the foot lifts up.
Overpronation:
In overpronation, the inner edge of the foot bends too much towards the inside. Overpronation can have several causes. (Foot misalignment, weak ligaments, beginner runners). Overpronation can be recognised by increased wear on the inside of the shoe. Rearfoot runners in particular tend to overpronate. The consequences of overpronation are increased strain on the joint apparatus in the ankle. Overpronation can be corrected with orthopaedic insoles or reinforced shoes.
Supination:
Supination is the opposite movement of pronation and can be recognised by increased wear on the outside of the shoe in the front area. When leaving the ground, the foot is positioned towards the inside. The lack of cushioning often results in damage to the ligaments and bones in the ankle joint. Sufficiently cushioned or reinforced shoes should be used as well as orthopaedic insoles.
-> Footprint phases shown by the sports director
-> Shoe check of the participants; are the inner or outer sides more stressed?
-> Note: free running style analyses in most sports shops and assistance in choosing the right shoes (reinforced shoes)
The running style is often neglected during training. An individually customised and correct running style helps to prevent injuries and overloading and also helps to make the running style more economical. The nodal points of the running movement can be individually analysed by means of observation or videos. Deficits and errors can be communicated and corrected with suitable exercises. This allows you to organise your running style economically, efficiently and, above all, injury-free in the long term. Typical running technique errors include:
Overcrossing
Overcrossing is when the foot crosses over the centre line of the body during the running movement. This is often associated with tilting of the pelvis.
- Causes: Functional leg length discrepancy, muscular imbalance.
- Problems: Overpronation, forefoot supination.
- Measures: Stretch adductors, strengthen abductors, coordination and stability exercises, conscious running style corrections.
Circumduction
In a circumduction, the foot is guided forwards from the outside ("duck walk") after the kick. This results in a gyrating movement.
- Cause: insufficient knee lift, low hip extension in the push-off, insufficient lifting of the lower leg in the swing phase.
- Problems: unphysiological knee movement with rotation, inefficient and uneconomical running movement.
- Measures: Strengthening the hip flexor and posterior thigh muscles, coordination training, running ABC.
Diminished hip extension
Diminished hip extension is observed in many runners. The extension is often achieved by tilting the pelvis forwards (hollow back). Insufficient hip extension usually also leads to poor knee joint extension.
- Cause: Muscular imbalances, poor running technique.
- Problems: Back problem (lumbar spine), patella overload with insufficient knee extension.
- Measures: Stretching the anterior thigh muscle and hip flexor, strengthening the buttocks, posterior thigh muscles and abdominal muscles, running ABC.
Insufficient knee extension
Insufficient knee extension in the push-off phase is often associated with excessive sinking in the hip and knee joint in the support phase.
- Cause: Shortening of the thigh and hip muscles causes insufficient hip extension. Insufficient strength of the hip extensors and posterior thigh muscles.
- Problems: Jumper's knee, long-term patella arthrosis, poor efficiency due to shortened stride length.
- Measures: Targeted stretching, training running style, running ABC.
-> error patterns demonstrated by the sports director
-> in future, the sports director should observe the participants during running exercises and point out error patterns
-> participants should also be sensitised to mutual corrections/tips among themselves in order to achieve progress
1 flipchart with the most important keywords for the running style analysis and possibly pictures (optional)
Info: running training
Introduction/Info
Your natural running style depends on your individual physique and statics. If you train regularly, you will certainly want to optimise your personal running style at some point. This not only allows you to run faster and longer with less effort, but also reduces the risk of overuse injuries.
If you've ever observed other runners, you've probably noticed that there are more beautiful (aesthetic) and less beautiful running styles. Running errors, unsuitable running shoes, cramped arms that swing back and forth in front of the body, hollow crosses, strides that are too long - all of these can have a negative impact on your running style and use up too much energy that you would actually like to use for running.
You can influence around 90% of your performance with endurance training and 10% with technique training.
Strong muscles are a good preventative measure against poor posture, slipped discs and back pain. Weak pelvic and core muscles also have a negative effect on running posture and running style. You can pay attention to the following points during running training:
Look about 10 metres ahead at the ground to relieve the strain on your neck muscles and run more relaxed.
The "control" of your body starts in your head! Keep your head upright but make sure your cervical spine is in a relaxed position.
The arms swing loosely back and forth in the direction you are running.
The hands are relaxed and hardly move at all. The thumb rests loosely on the index finger, the back of the hand points outwards.
The forearm and upper arm form almost a right angle.
The thigh swings forwards in the front swing phase until the ankle is approximately vertically below the kneecap.
The foot touches down slightly in front of the body axis. The footprint is active and directed backwards. The knees and hips are fully extended during the push-off.
The heel swings to the height of the knee or above (depending on the running speed) during the back swing phase.
The upper body is erect, almost stretched, so that the spine is relieved and can swing in a relaxed manner above the body's centre of gravity. This allows you to lengthen your stride by up to 2 cm!
With a fluid running style, the centre of gravity moves up and down only slightly. This saves a lot of energy!
Beginners often sit with their pelvis tilted backwards. The pelvis should be tilted slightly forwards. This automatically straightens the upper body.
Sometimes a mental image helps to make the movement more fluid: imagine that you are being moved like a marionette. Invisible strings are attached to the head and torso, which carry out the movements and keep the body upright.
-> complete medium distance: Demonstration / imitation / mutual observation / correction
-> if available, shift to a slightly sloping/rising terrain (hill/wall)
Running technique when running downhill / uphill
If you have to run downhill, this is where the greatest strain occurs. Reduce your speed when running downhill (even if it could be quite fast right now!). The upper body should be slightly tilted back.
When running uphill, lean your upper body forwards a little more than if you were running straight ahead. Make sure you take short steps with a more intense impact and let your arms swing vigorously.
That's a bit of a lot of points to remember, you might be thinking?
The best thing to do is to set yourself a small goal for each run. For example: "I'll make sure that my foot touches down just before the centre of my body."
Note (possible repetition according to the motto: constant dripping wears away the stone):
It would be even better to have a running style analysis carried out by a specialist. Practically all sports equipment shops now do this and help you choose the right shoes. However, progress can also be made here with the help of fellow runners (observations and tips).
You can also improve your running style with a regular strength training and stretching programme. Balancing exercises, optimal leg stretching and a regular running ABC programme are also very good.
1 flipchart with instructions for running training (optional)
Info: Light contact
Introduction/Info
The technical elements are demonstrated practically by the instructor.
Ideally, the participants follow the movements immediately (demonstration - imitation).
- Light contact boxing is a variant of boxing in which no strong punches are allowed and the opponent may only be touched.
- Basic rules:
- Handshake: before and after duels, apology after a blow that is too hard, expression of respect towards the opponent.
- Commands: "Box" (release the ring); "Stop/Break" (interruption of the fight).
- Boxing position:
- Position of the legs: Feet shoulder-width apart; body weight distributed on both balls of the feet; foot slightly set back on the side of the stronger hand; heel of front foot = toe of back foot.
- Position of the upper body: punching hand at the side of the cheek; leading hand at eye level approx. 10-20cm in front of the head; back of the hand pointing outwards; shoulder girdle slightly raised and brought forwards ("tighten rucksack").
- Continued movement:
- Sliding in stride: Push off with the foot standing behind in the direction of movement; offset front foot 10-15cm; movement dynamically gliding over the ground; flat jumps possible.
- Diagonal gait: Simultaneous strike and step leads to twisting of the hips (e.g. Step with left leg forwards & punch with right fist; step with right leg backwards & punch with right fist)
- Passing gait: no twisting with simultaneous step and punch (e.g. step with left leg forwards & punch with left fist; step with left leg backwards & punch with right fist)
- Punches:
- Straight: Straight punch on the most direct path to the target; push-off of the balls of the feet on the same side - hip rotation - extension of the arm; target: chin, nose, forehead; bring the opposite hand back to the cheek (cover)
- Sideways punch: push-off of the balls of the feet on the same side - hip rotation - rotation around the longitudinal axis of the body - punch in a circle from the outside to the inside; forearm in a horizontal position; 90° angle in the elbow and shoulder joint; opposite hand is at the side of the cheek.
- Upward punch: Slightly lower the upper body and fist (preparation); stretch the legs, hips and torso and bring the forearm up vertically in front of the body; fist hits the chin from below.
- Defence:
- Head cover (inside hand block): Turn the palm of the punching hand towards the opponent; bring the fist slightly forwards and catch the opponent's straight; arm spring-loaded.
- Elbow block: Turn the body out around the longitudinal axis; bring the elbow towards the body (arm covers the body); body remains upright; fists remain at head height.
- Lateral avoidance: Bend body forwards at an angle; shift body weight to the respective side; head remains behind the fists; duck to the outside of the opponent's arm.
- Rolling avoidance: Avoidance movement for sideways chopping; lower the upper body sideways, pass under the opponent's punching arm and raise it again on the other side; the nose draws a circle in the air.
1 poster with key points on the subject of light contact
Info: Nordic Walking
Introduction/Info
Nordic walking: moderate exercise for the body
The use of poles turns walking into a workout that also works the muscles of the upper body. Nordic walking is just as suitable for ambitious athletes as it is for untrained people. However, contrary to claims to the contrary, the joints are put under more strain than with normal walking. According to a study, the oxygen consumption (and therefore the endurance load) is approx. 5 per cent higher when Nordic walking is performed correctly than when conventional walking is performed without additional upper body movement.
Walking is a sport with a cyclical movement sequence. The right pole always touches the ground when the left heel touches down, the left pole when the right heel touches down. The poles are held close to the body. The respective pole is used diagonally backwards, the pole should always be used below the body's centre of gravity, i.e. in the stride position on the vertical body axis. Double pole technique)
Note: A pole that is too short is a hindrance to functional movement. The following rule of thumb can be recommended for the length of the poles Body height (in cm) x 0.66 = pole length. If in doubt, it is advisable to select a slightly shorter pole length than calculated to prevent evasive movements in the shoulder joints.
1 flipchart with memo points (optional)
Info: Organisation/settings of the equipment in the fitness room
Introduction/Info
Explain to participants how to organise the fitness room:
- Where to put what; always put equipment away after use
- Hygiene; use a sweat towel and clean equipment after use
Explain to participants how to use and correctly adjust the equipment:
- Spinning bike
- Correct adjustment of saddle and handlebar height
- . and handlebar height
- How the display works
- Change pedalling resistance
- Use the pulse belt
- Rowing machine
- How the display works
- Correct movement execution
- Change traction resistance
- Power tower
- Correct adjustment of the equipment (seat height, levers etc.) / correct posture
- Exercise executions
- Cable pull
- Incline bench
- Leg press
- Forearm supports
- Bench press
- Shoulder thrusts
- Leg bends
- Butterfly
- Free weights
- Exercise executions / correct posture
-> stable/straight upper body (keyword: Spine)
- Exercise executions / correct posture
For demonstrating the settings on the equipment:
1 spinning bike
1 rowing machine
1 strength tower (8-10 stations)
2 free weights