Exercises (3161)
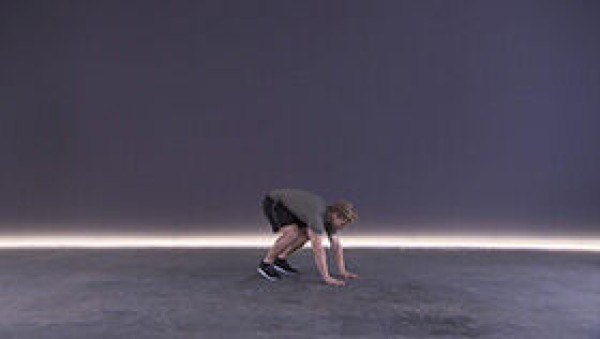
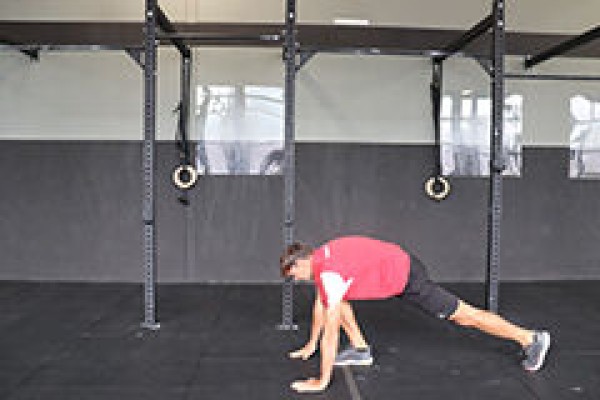
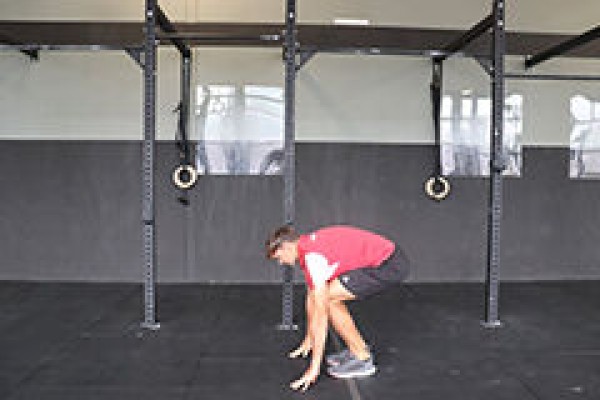
Push-up and jump over the barbell ► burpee over bar
Power
Individual work
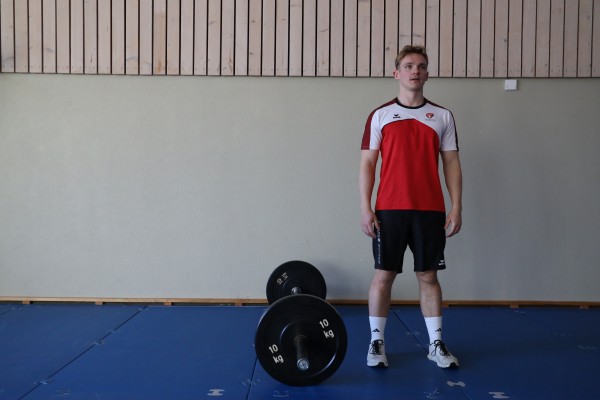
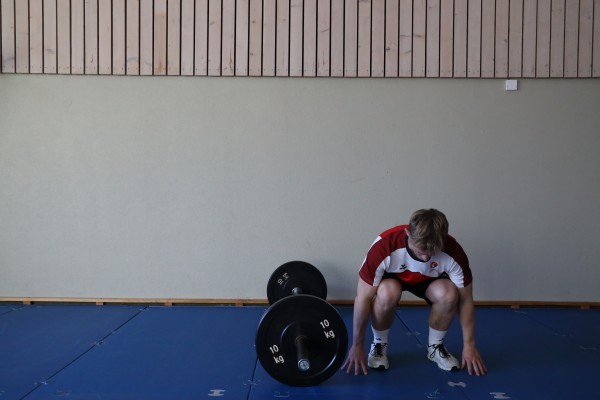

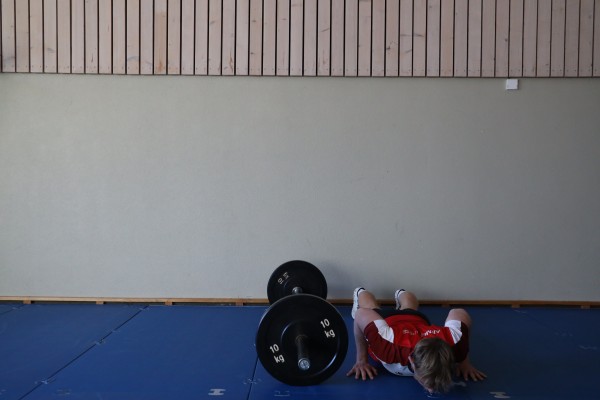
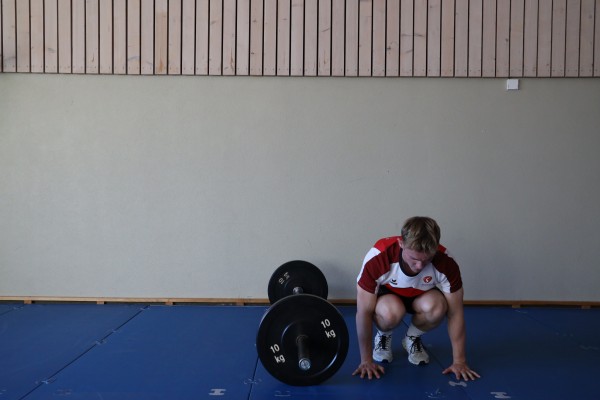
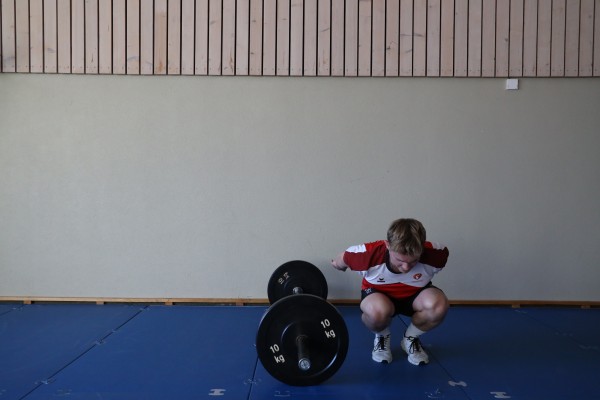
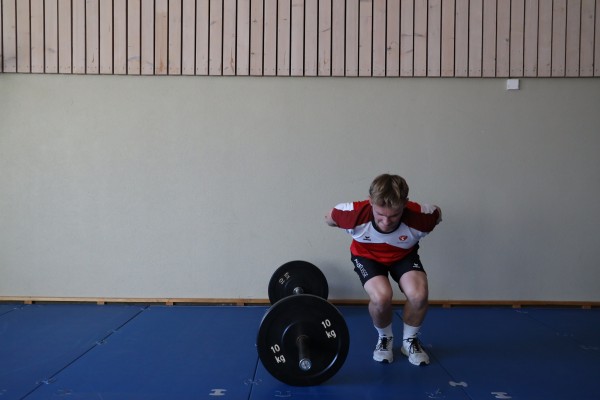
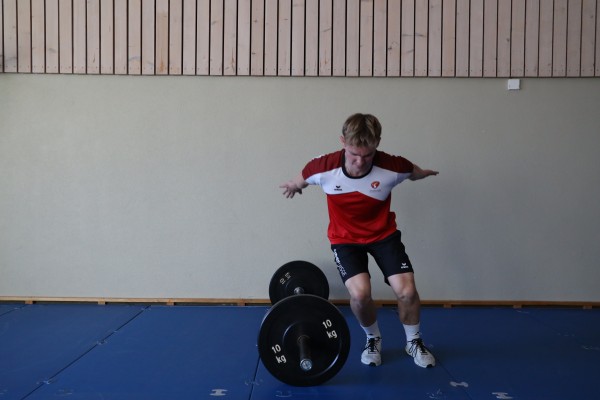
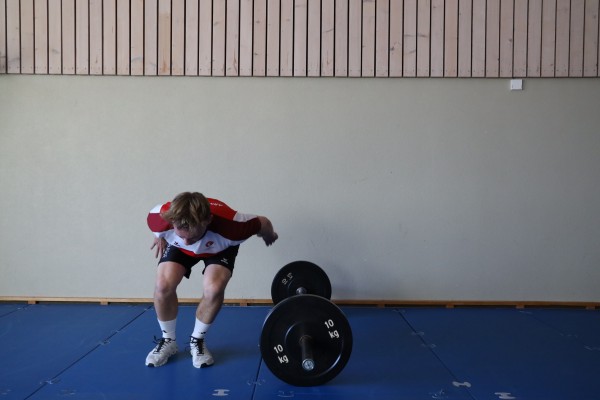
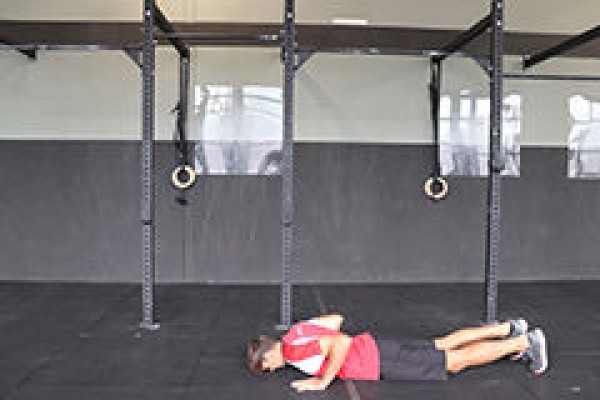
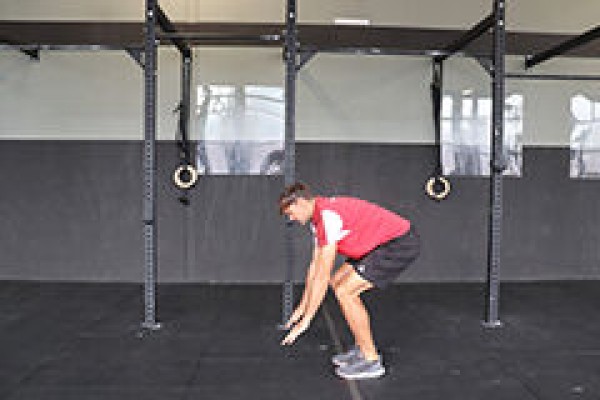
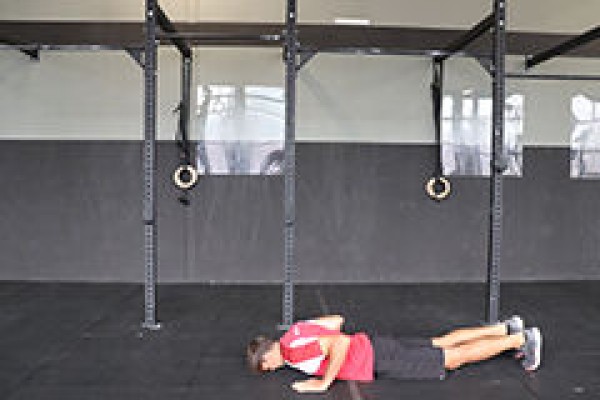
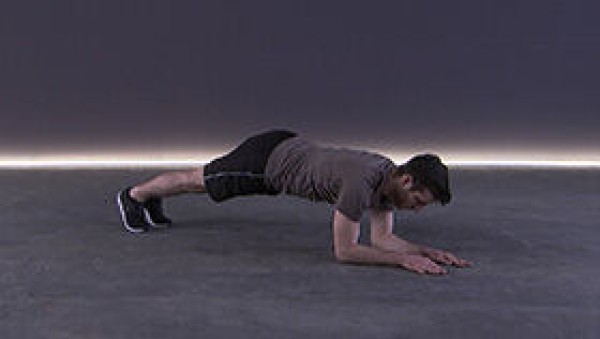
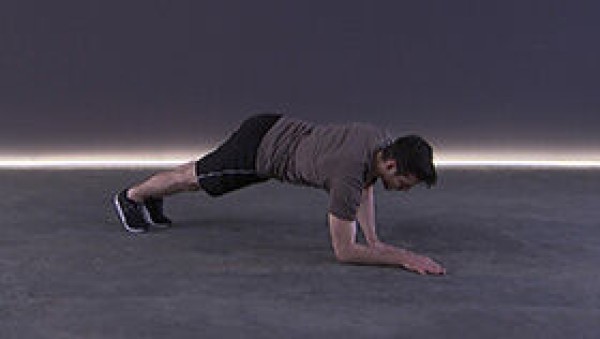
From a standing position, bend your legs and place your hands next to your feet to get into a squat position. Support yourself with your hands and jump backwards with both legs to get into a push-up position. Bend your arms to fully lower your upper body (prone position). From the prone position, push back into the push-up position with both arms and jump back into the squat position. In the squat position, the upper body is tilted slightly forwards, stretch your arms backwards at an angle along your body (like a ski jumper on a ski jump), push off the floor powerfully to perform a jump (lateral-sided) over the barbell (use the momentum of the arms). Straighten your upper body and restart the exercise (assume a push-up position) to finally jump back to the starting position.
Attention:
Do not arch your back in the push-up position (body tension); land on the floor as softly as possible (cushion the jump with your knees); be careful with the jump height when jumping over the barbell.
Lighten:
Lower intensity between the individual exercises; only jump into the push-up position and back into the squat (without prone position/push-up).
Harden:
Additional weight; higher intensity between the individual exercises.
Variant I:
Jump over the barbell from the front.
1 barbell
2-4 weight cuffs / 1 weight waistcoat ► Make the exercise more difficult (additional weight)
Alternating push-ups and stretch jumps ► burpee
Power
Individual work
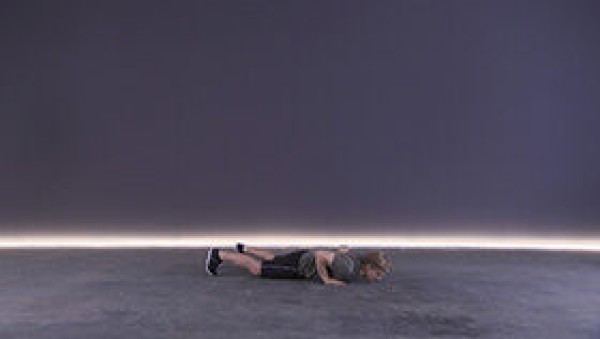
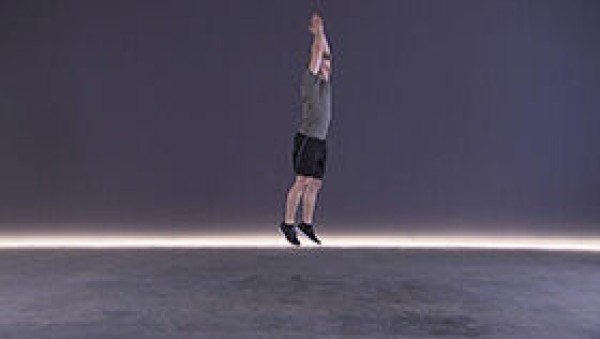
From a standing position, bend your legs and place your hands next to your feet to get into a squat position. Support yourself with your hands, jump backwards with both legs to get into the push-up position. Bend your arms to fully lower your upper body (prone position). From the prone position, push back into the push-up position with both arms and jump back into the squat position. From the squat position, perform a stretch jump and land back in the starting position (standing).
Attention:
Do not arch your back in the push-up position (body tension).
Lighten:
Lower intensity between the individual exercises; lower height for the stretch jump (or just straighten your upper body); place your knees on the floor for the push-ups (feet held high).
Harden:
Additional weight.
2-4 weight cuffs/1 weight waistcoat ► Make the exercise more difficult (additional weight)
Push-up and moving an object to the side in the push-up position ► drag push up position
Power
Individual work
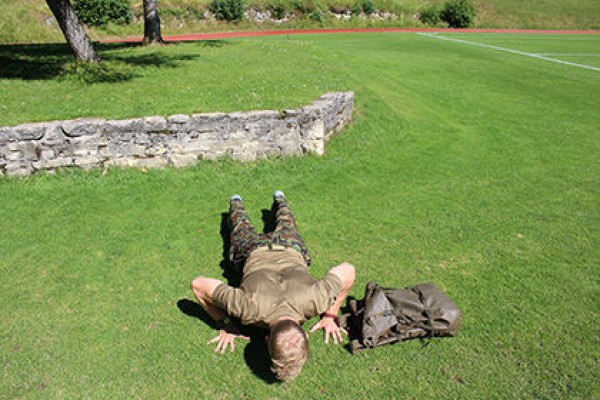
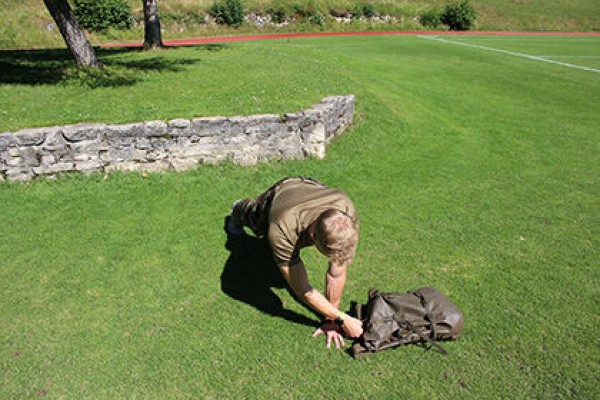
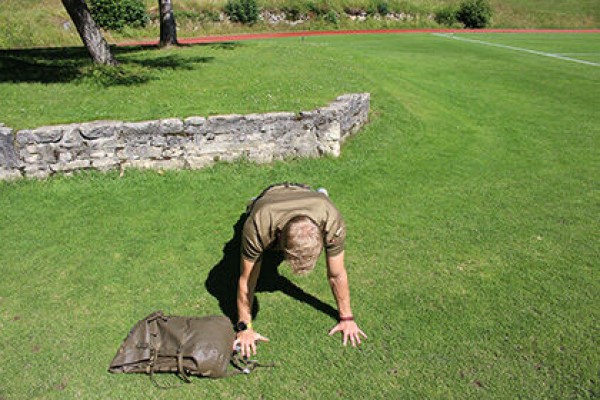

Push-up position, place an object (e.g. combat rucksack) on one side next to the hand (next to the little finger). Perform a push-up, grab the object and pull/push it to the other side, perform another push-up before returning the object to the starting position.
Attention:
Do not arch your back, tense your core.
Lighten:
Support in place; place your knees on the floor; only move the object between your arms.
Harden:
Additional weight (on your shoulders or for moving); unstable support for your legs.
1 combat backpack
1 weight vest/weight disc/sandbag/(additional) combat backpack ► making the exercise more difficult (additional weight)
1 sandbag ► making the exercise more difficult (load)
1 ball/1-2 balance cushions/1 balance board ► making the exercise more difficult (unstable base)
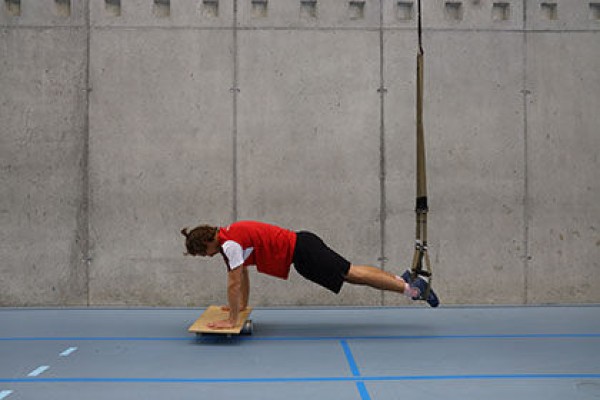
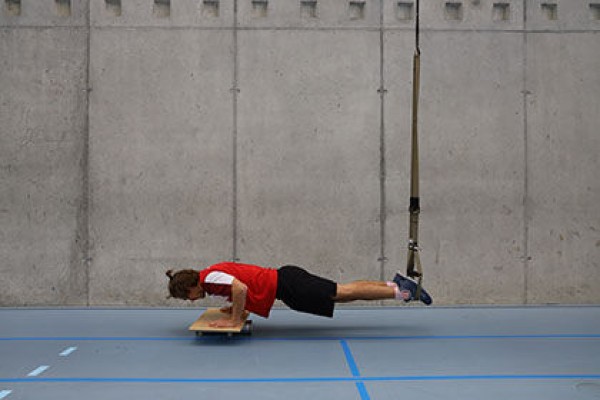
Push-up position
Power
Individual work
Progression I:
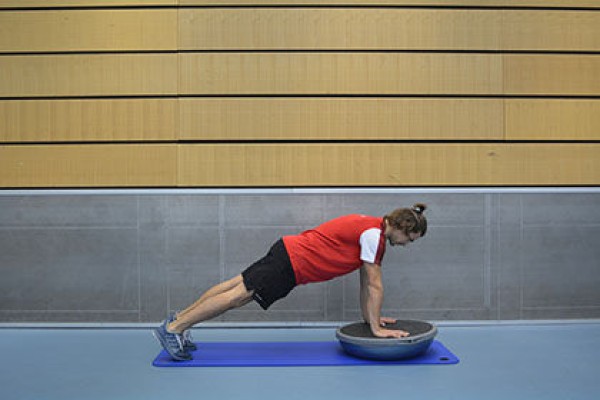
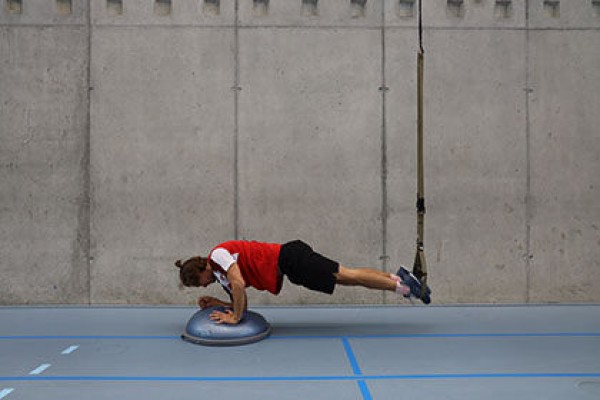
Adjust the sling trainer to mid-lower leg length (standing), support position with outstretched arms on the balance board with the feet vertically under the attachment point in the slings, hold position.
Progression II:
Integrate push-ups.
Caution:
Keep body tension, do not let hips sag, back straight, hands under shoulders (for both progressions).
1 sling trainer
1 balance board
Push-up position
Power
Individual work
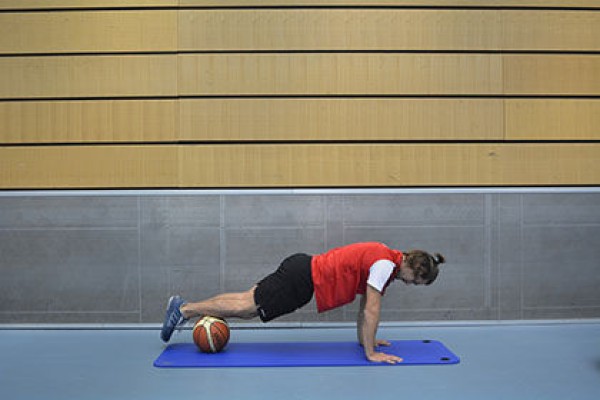
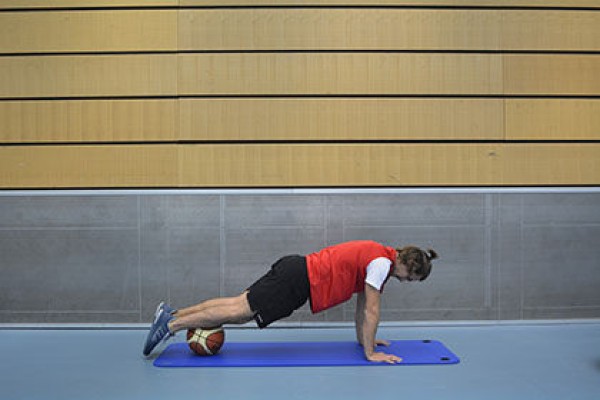
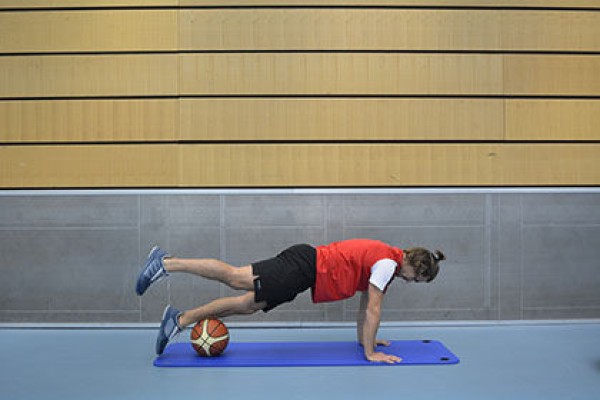
Push-up position, legs (shins) placed on the exercise ball, alternately lift one leg slightly and return to the starting position.
Attention:
Head, shoulders, buttocks and feet form a line, no hollow back, actively tense the torso. To prevent the ball from rolling away, you can lean it against a wall.
Lighten the load:
Support yourself in place (without lifting and lowering your legs); exercise ball closer to your hips.
Lighten the load:
Additional weight (on your back); unstable support for your arms.
1 exercise ball
1 medicine ball/helmet/balance hemisphere
1 weight vest/weight disc/sandbag ►Make the exercise more difficult (additional weight)
Push-up position ► hand over push up position
Power
Partner work
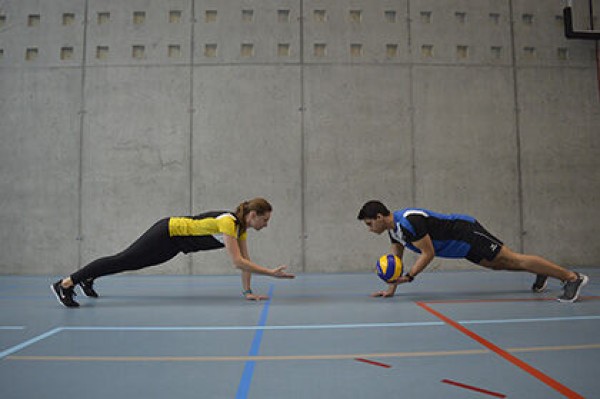
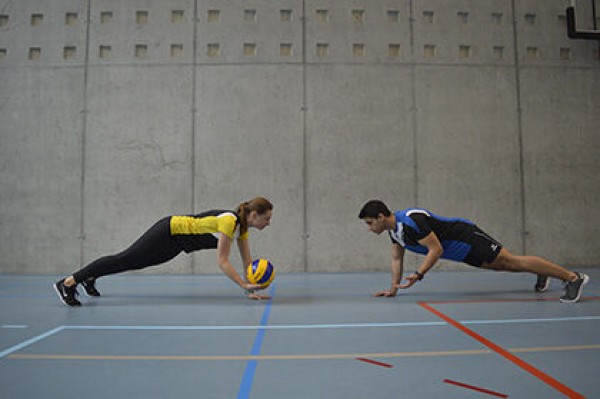
Both participants stand at a distance of approx. 1 metre from each other in a frontal push-up position with their feet wide apart. The partners pass a ball back and forth (straight or crosswise) without it touching the floor. From time to time or after each pass, the participants change supporting hand.
Attention:
Keep the trunk stable and do not let it sag (constant tension).
Lighten:
Roll the ball on the floor to the partner; lighter ball.
Harden:
Heavier ball; additional weight (on the back).
1 weight ball
1 ball (e.g. volleyball/football/basketball) ► Make the exercise easier
1 weight ball/medicine ball ► Make the exercise more difficult (additional weight)
1 weight vest/weight disc/sandbag ► Make the exercise more difficult (additional weight)
Push-up position high
Power
Individual work
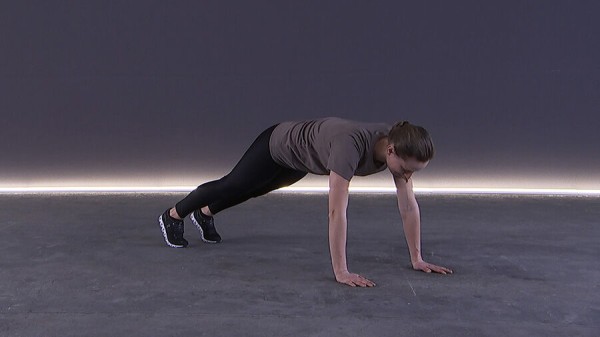
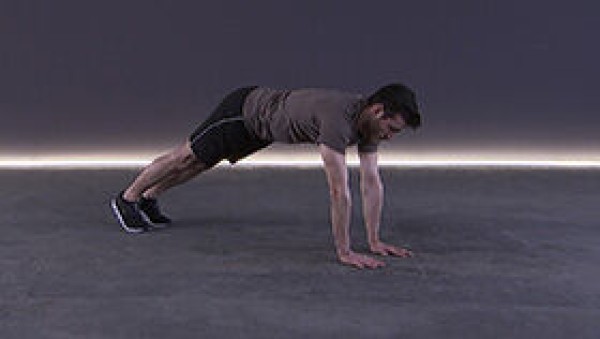
High push-up position (support), hold position.
Attention:
No hollow back, elbows bent approx. 45° from upper body ("A" shape with arms), shoulders are fixed and pulled down towards hips.
Lighten:
Place knees on floor (feet in high position); support arms on raised surface.
Harden:
Additional weight (on your back); place your legs on a raised surface; unstable surface for your arms and/or legs; hold a low push-up position.
Variant I:
Vary the position of the hands/arms (e.g.: wide, narrow, together).
Variant II:
Alternate touching the opposite shoulder with your hand.
1 weight vest/weight disc/sandbag ► Make the exercise more difficult (additional weight)
1 ball/1-2 balance cushion/balance board ► Make the exercise more difficult (unstable base)
1 raised base ► Make the exercise easier or more difficult (position)
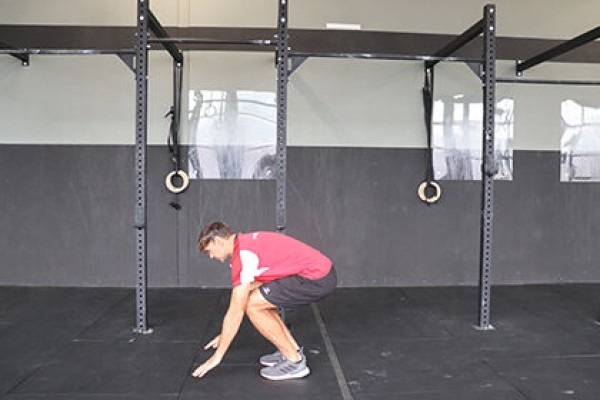
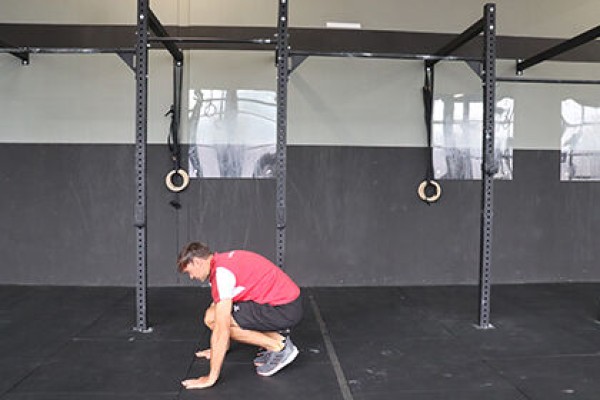
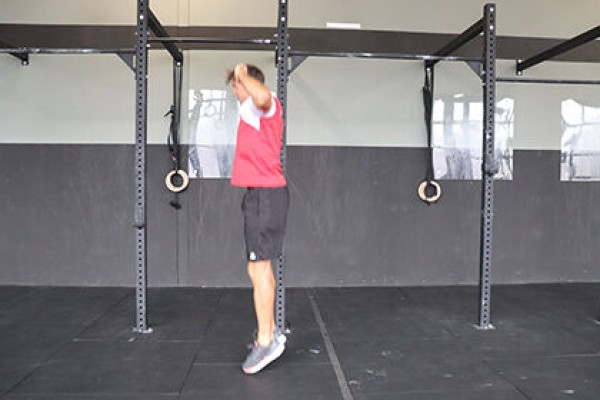
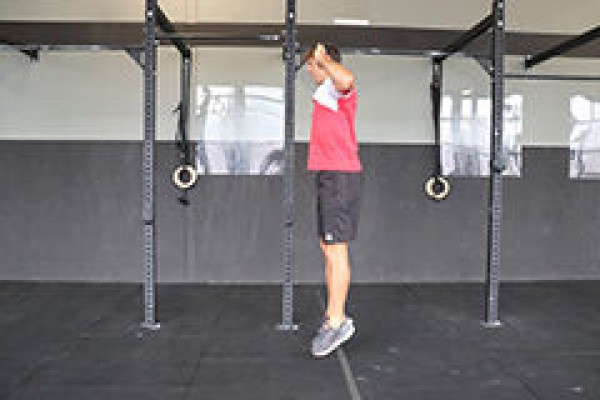
Alternating push-up position and upright standing position ► jump back
Power
Individual work

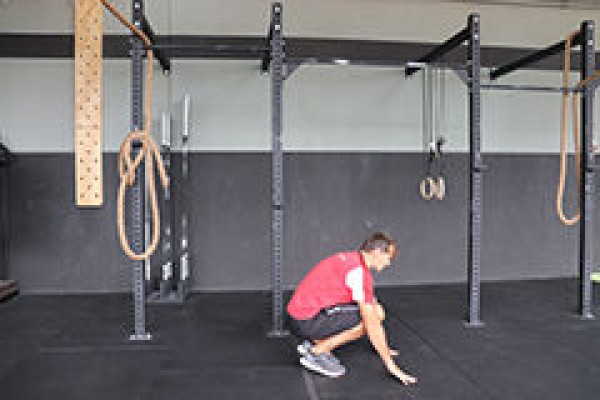
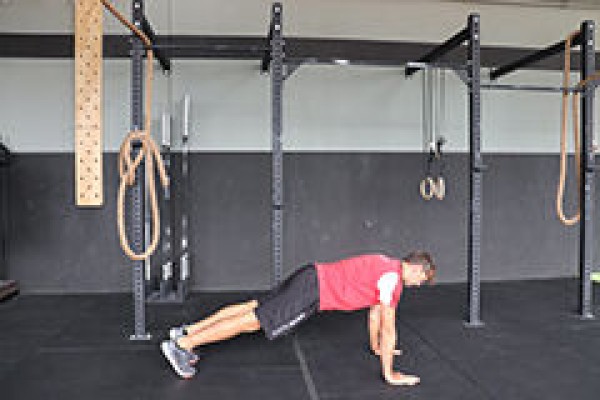
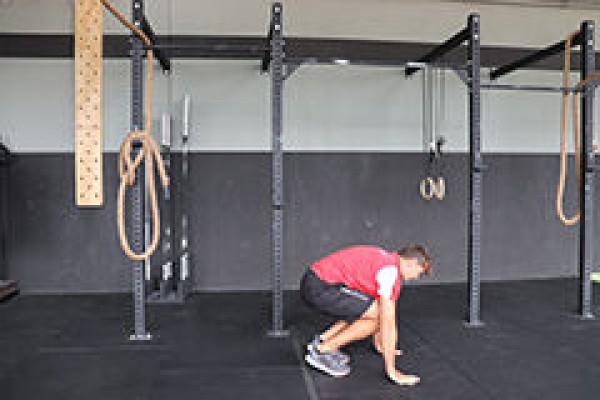
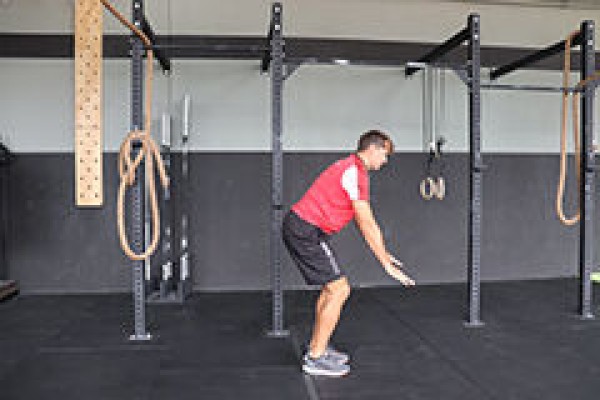
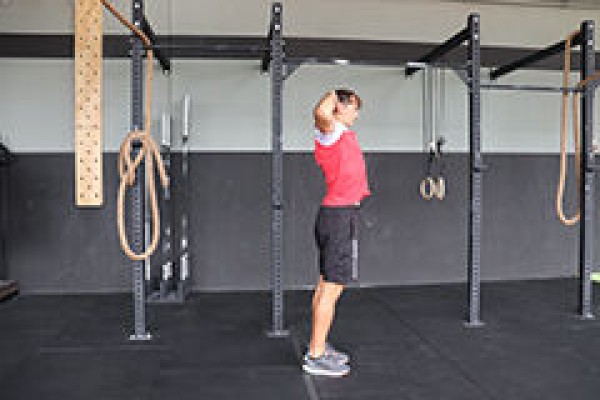
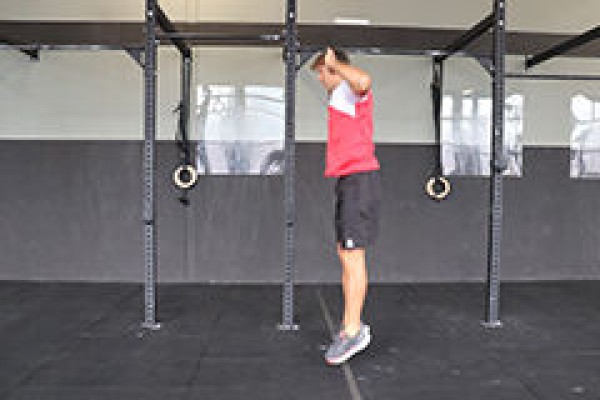
From a standing position, bend your legs, place your hands in front of your feet and jump backwards with both legs at the same time to get into a push-up position. Then jump back forwards with both legs to the starting position of the legs, from this squatting position straighten back up to standing. Cross your arms behind your head and push your pelvis forwards (hollow back) before returning to the starting position in an upright position to start the exercise again.
Attention:
No hollow back in the push-up position (body tension).
Lighten:
Lower intensity between the individual exercises.
Harden:
Additional weight (on the legs).
2 weight cuffs/1 weight waistcoat ► Make the exercise more difficult (additional weight)
Push-up position and jump to the side alternating ► burpee & box jump over / side jump
Power
Individual work
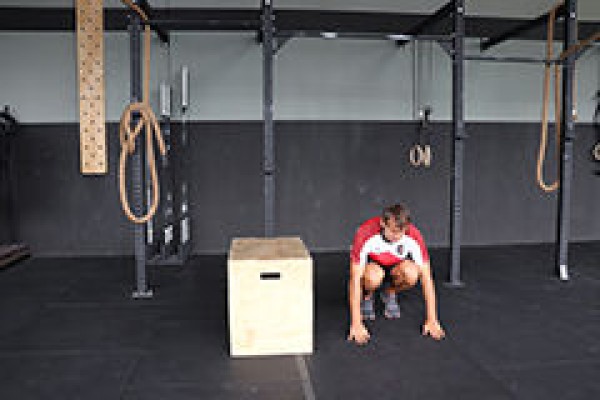
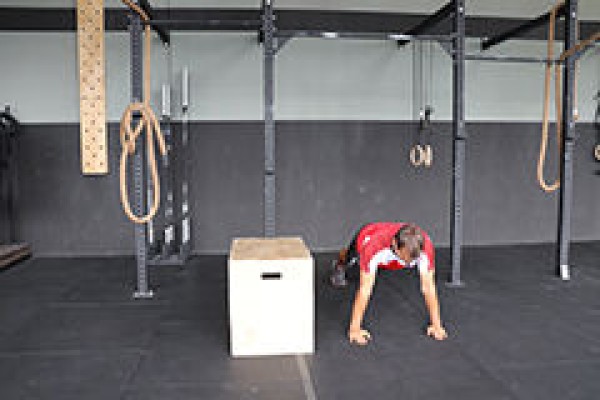
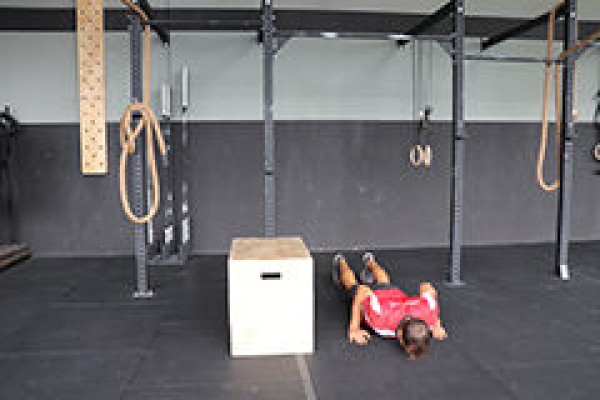

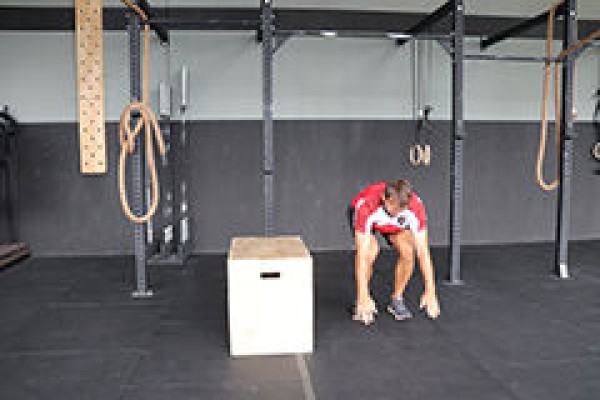
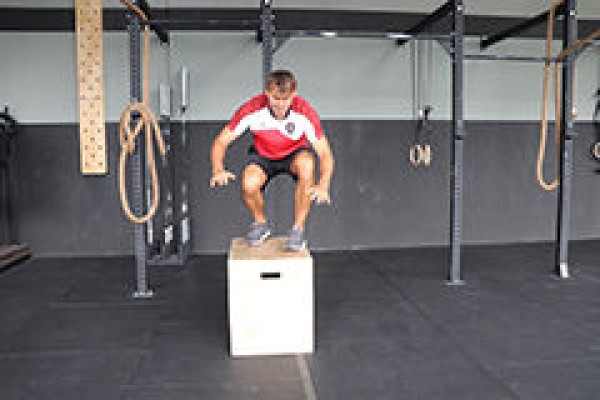
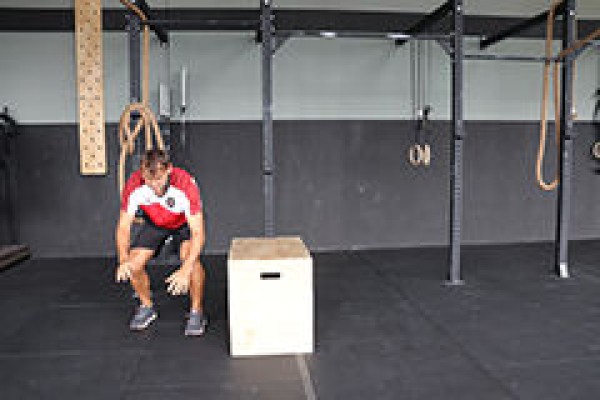
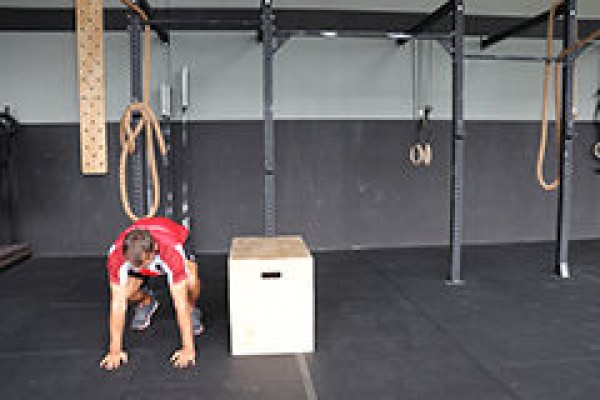
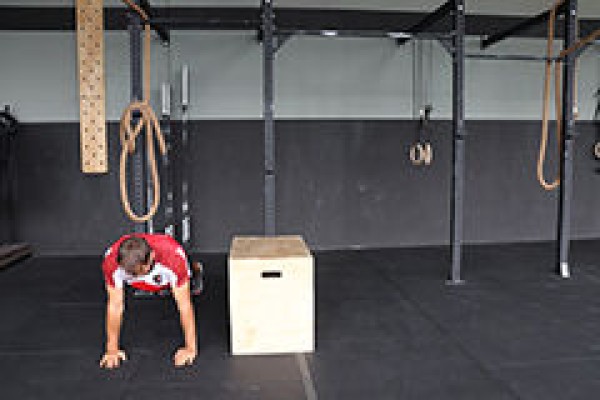
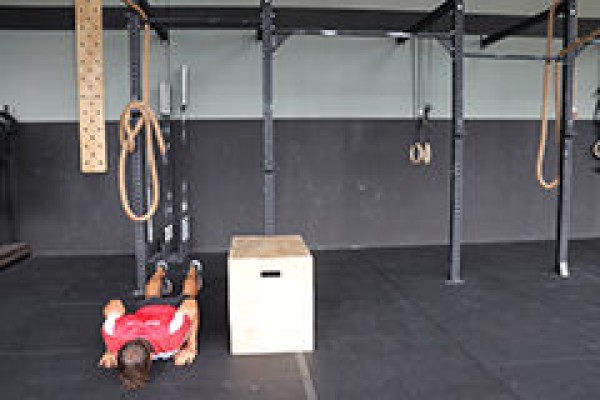
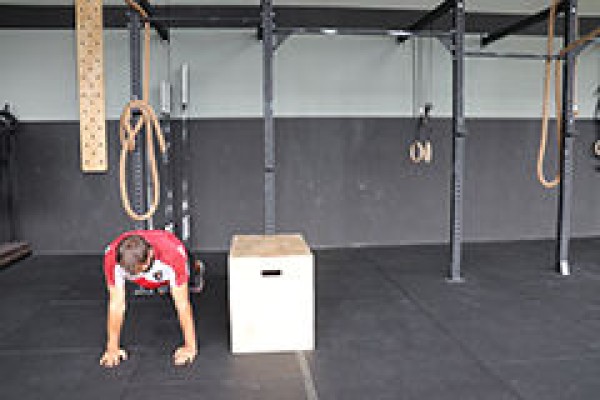
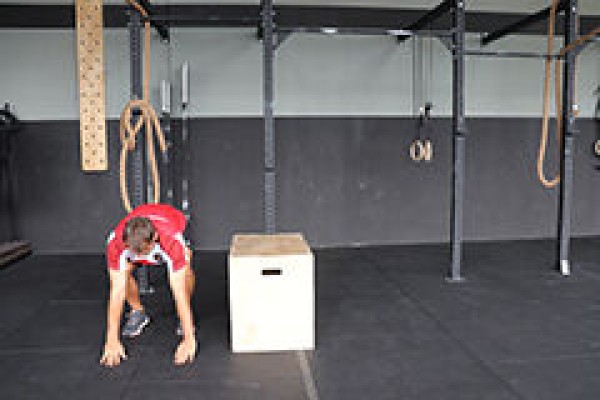
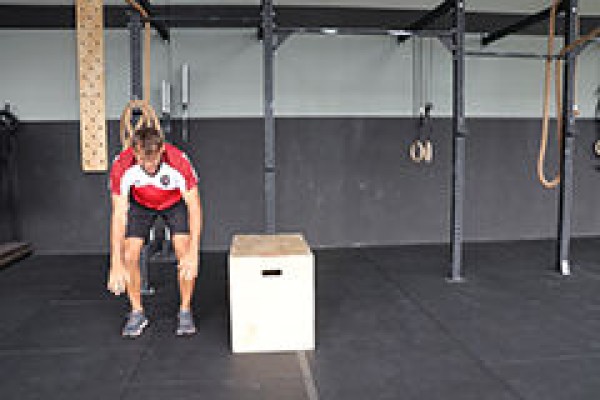
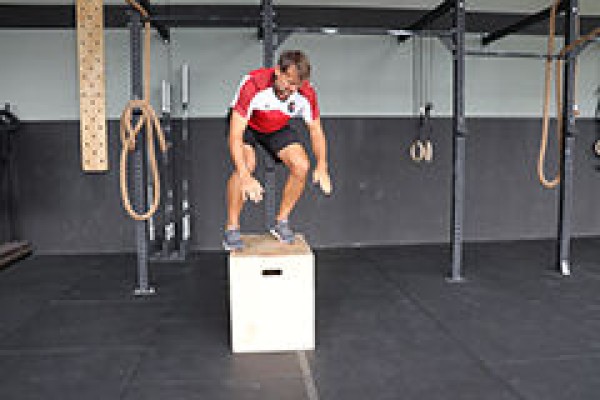
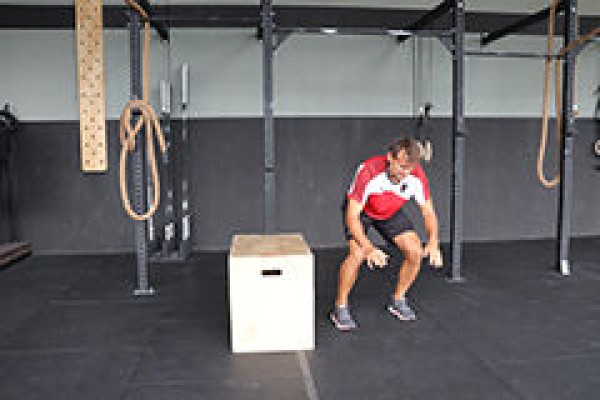
Stand upright and stand next to a raised object (plyo box or vaulting box element incl. top). From a standing position, bend your legs and place your hands next to your feet to get into a squat position. Support yourself with your hands, jump backwards with both legs to get into the push-up position. Bend your arms to fully lower your upper body (prone position). From the prone position, push back into the push-up position with both arms and jump back into the squat position. From the squat position, powerfully push your legs off the floor to perform a sideways jump onto the raised object (use the momentum of your arms). Without straightening the upper body and stretching the legs (again in the squat position), immediately jump again to the other side of the raised object. After landing (no need to stand upright), restart the exercise sequence from the squat position and then jump back to the starting position.
Attention:
Land as softly as possible on the box and then immediately jump again.
Lighten:
Lower intensity between each execution; lower height to jump over.
Harden:
Additional weight; higher object to jump over.
Variation:
Frontal jumps up and down from the object.
1 flat bench/plyo box/swivel box
2-4 weight cuffs/1 weight waistcoat ► Make the exercise more difficult (additional weight)
Push-up position and stretch jump alternating ► half burpee
Power
Individual work

From a standing position, bend your legs, place your hands in front of your feet and jump backwards with both legs at the same time to get into a push-up position. Then jump back forwards with both legs to the starting position of the legs, perform a stretch jump from this crouching position (optionally cross your arms briefly behind your head during the flight phase) and land back in the starting position to begin the exercise again.
Attention:
No hollow back in the push-up position (body tension).
Lighten:
Lower intensity between the individual exercises; lower height during the stretch jump (or only straighten the upper body).
Harden:
Additional weight.
2-4 weight cuffs/1 weight waistcoat ► Make the exercise more difficult (additional weight)
Alternating push-up position and stretch jump ► scaled burpee
Power
Individual work
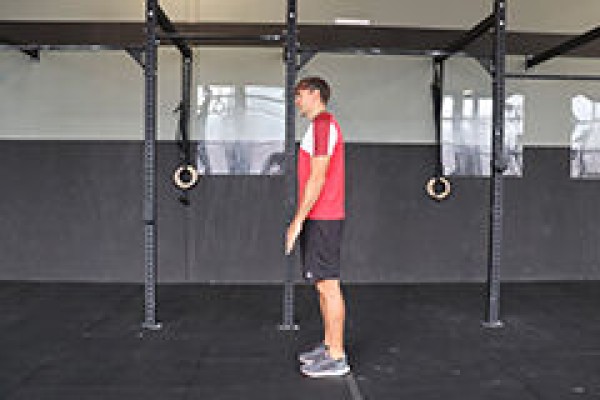

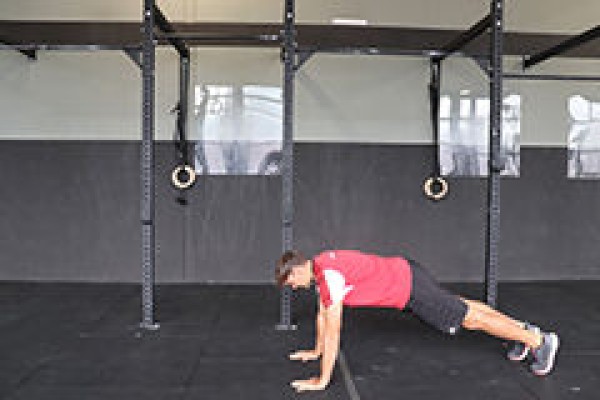
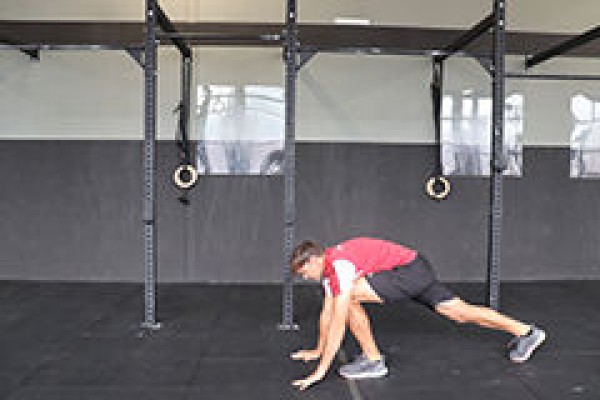
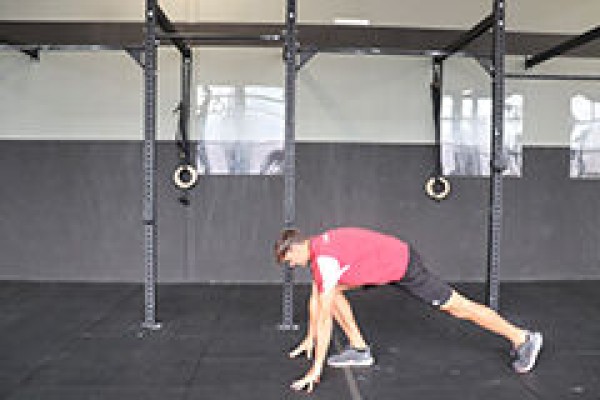

From a standing position, bend your legs and place your hands next to (in front of) your feet to assume the squat position. Support yourself with your hands and alternately move one leg backwards to reach the push-up position. Bend your arms to fully lower your upper body (prone position). From the prone position, use both arms to push yourself back into the push-up position, then alternately move one leg back into the squat position. From this squatting position, perform a stretch jump (optionally cross your arms briefly behind your head during the flight phase) and land back in the starting position to begin the exercise again (change which leg is moved backwards or forwards first for each exercise).
Attention:
No hollow back in the push-up position (body tension).
Lighten:
Lower intensity between the individual exercises; lower height during the stretch jump (or only straighten the upper body).
Harden:
Additional weight.
2-4 weight cuffs/1 weight waistcoat ► Make the exercise more difficult (additional weight)
Deep push-up position
Power
Individual work
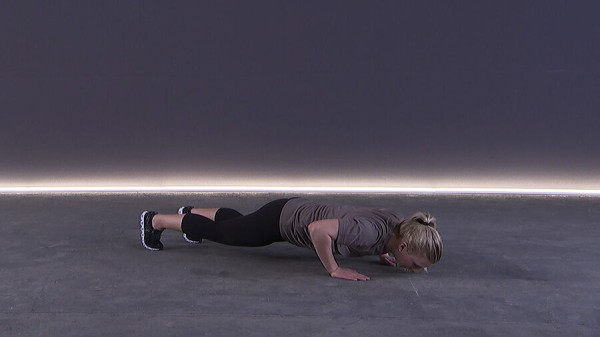
Deep push-up position, hold position.
Attention:
No hollow back, elbows bent approx. 45° from upper body ("A" shape with arms), shoulders are fixed and pulled down towards hips.
Lighten:
Place knees on floor (feet in high position); lower upper body less (arms barely bent); support arms on raised surface.
Harden:
Additional weight (on the back); place legs on a raised surface; unstable surface for the arms and/or legs.
Variant:
Vary the position of the hands/arms (e.g.: wide, narrow, together).
1 weight vest/weight disc/sandbag ► Make the exercise more difficult (additional weight)
1 ball/1-2 balance cushion/balance board ► Make the exercise more difficult (unstable surface)
1 raised surface Make the exercise easier or ► Make the exercise more difficult (position)
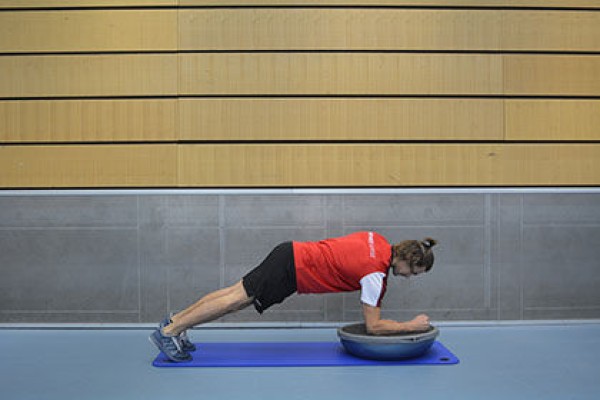
Push-up position and forearm support alternating ► push up position & elbow plank / push up position & front plank / push up position to elbow plank / push up position to front plank
Power
Individual work
Switch from the push-up position to the forearm support and back (bend and stretch one arm at a time).
Attention:
Head, torso, hips and knees practically form a line (do not stretch your buttocks upwards or let them sag, tense your stomach).
Lighten:
Knees on the floor.
Harden:
Additional weight (on the back); unstable base for the legs.
1 weight vest/weight disc/sandbag ► to make the exercise more difficult (additional weight)
1 ball/balance cushion/balance board ► to make the exercise more difficult (unstable surface)
Liegestützposition und Unterarmstütz alternierend ► push up position & elbow plank / push up position & front plank / push up position to elbow plank / push up position to front plank
Power
Individual work
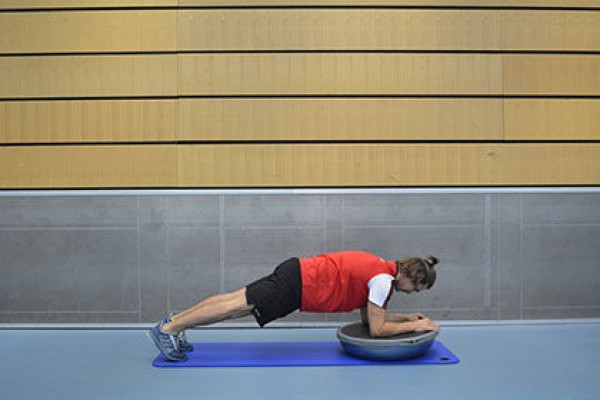
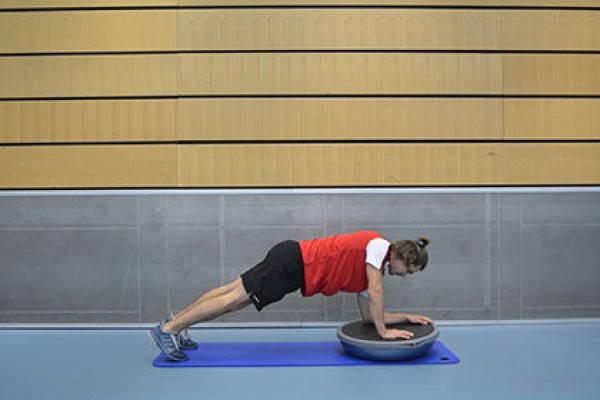
Switch from the push-up position to the forearm support and back (bend and stretch one arm at a time), placing the hands or forearms on a balance ball.
Attention:
Head, torso, hips and knees practically form a line (do not stretch your buttocks upwards or let them sag, tense your stomach).
Lighten:
Perform the exercise without the balancing hemisphere; knees on the floor.
Harden:
Additional weight (on the back); unstable base for the legs.
1 balance hemisphere
1 weight vest/weight disc/sandbag ► to make the exercise more difficult (additional weight)
1 ball/balance cushion/balance board ► to make the exercise more difficult (unstable base)
Liegestützposition und Unterarmstütz alternierend ► push up position & elbow plank / push up position & front plank / push up position to elbow plank / push up position to front plank
Power
Individual work
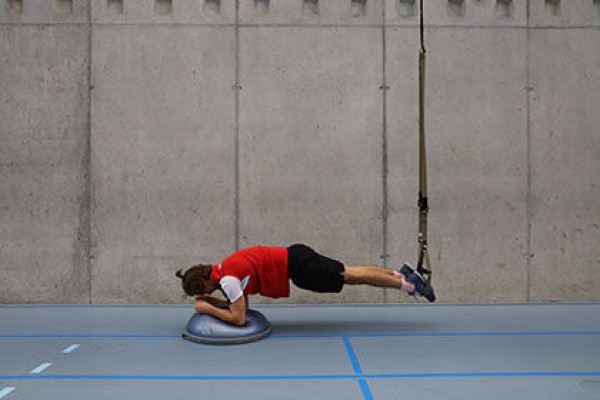

Switch from the push-up position to the forearm support and back (bend and stretch one arm at a time), with the hands or forearms placed on a balance hemisphere and the feet in the sling trainer (adjust the sling trainer to the length of the centre of the lower leg - while standing; feet vertically under the attachment point).
Attention:
Head, torso, hips and knees practically form a line (do not stretch your buttocks upwards or allow them to sag, tense your stomach).
Lighten:
Perform the exercise without the sling trainer and/or balance half-ball.
1 balance hemisphere
1 sling trainer
Push-up competition
Fighting and roughhousing games
Partner work
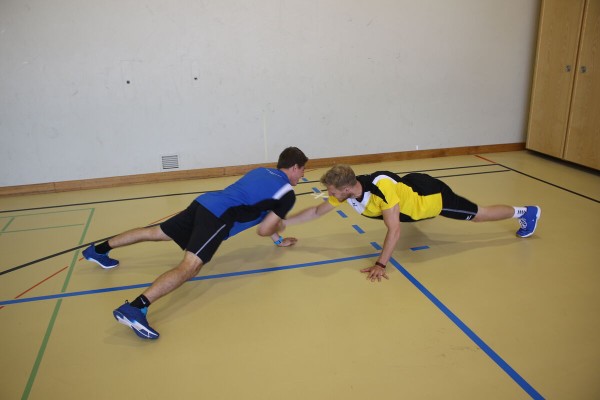
Two participants assume the push-up position (facing each other). The participants try to unbalance each other by pulling their arms away (or dodging). Whoever leaves the push-up position first (e.g. knees touch the floor) loses.
No material required
Push-up competition
Fighting and roughhousing games
Group work
The participants assume the push-up position and try to make another participant fall (knees on the floor) (pull hands away, push, dodge, unbalance, etc.). Whoever leaves the push-up position is eliminated and performs an additional exercise (e.g. wall sit, push-ups, forearm support). Which participant remains in the push-up position until the end?
No material required
Push-up worm
Stimulate circulation
Group work
4-6 participants per group
The group members stand in front of each other in the push-up position with their feet resting on the shoulders of the person behind them. The last member of the group stands in an upright position and leads the group around a defined point (e.g. around a turnaround, to the hall wall or over a certain line) and back.
Per group:
2 colouring sticks/marking cones/caps ►start and reversal mark (optional)
Light-Contact
Stimulate circulation
Legwork:
- Two participants are opposite each other. Participant A moves sideways with Chassé steps, participant B constantly tries to stay opposite their partner. After the roles have been swapped, it is also possible to move in all directions. Contact can be trained by having the fists of the leading hand of both participants touch slightly with each step.
- Two participants are opposite each other. Participant A takes 1-3 steps forwards, participant B tries to retreat without delay. As soon as A stops, the partner may attack 1-3 steps. The exercise is performed without punches, the hands are in a boxing position or clasped behind the body.
- Torero: The participants face each other at a slight distance. Participant A stretches his arm forwards and runs towards participant B (the fist is aimed at the opponent's forehead). Before the attacker catches the defender, participant B dodges to the side (outer side of participant A's arm).
Evasive manoeuvre:
- Duck avoidance: Participant A performs a straight punch (target opponent's forehead), Participant B ducks under the punch.
- Rolling avoidance: Participant A throws a slap/side-hook, Participant B rolls out the punch with an upper body movement.
- Lateral avoidance: Participant A performs a straight punch, participant B avoids to the outside of the partner's punching hand.
Defensive behaviour:
- From a standing position, participant A performs a single punch, participant B avoids by avoiding the upper body.
- From a standing position, competitor A performs a single strike, competitor B defends by blocking (defence with the arms).
- From a standing position, competitor A performs a single strike, competitor B evades by taking steps.
Competition:
- Both participants try to touch their opponent on the shoulder (note: only from the outside, not crosswise) and on the knees. After a hit, both participants move back and touch a defined line (e.g. volleyball sideline) before attacking again.
- one-touch: Both participants try to touch each other (excl. forearms, incl. forehead). With each hit, a defined line (e.g. volleyball line) is touched before the fight continues.
No material required
Light-Contact: Sensitisation level 1-3
Stimulate circulation
Partner work
Stage 1:
Touch in a controlled manner (an immobile target) from a standing position: Participant A puts his hands behind his back, participant B touches him with light blows to the stomach, shoulder and forehead. Participant A tries to keep his eyes open and gives feedback if the blow was too strong or missed.
Stage 2:
Controlled touching from a standing position (a moving target). Participant A puts his hands behind his back, participant B touches him with light blows to the stomach, shoulder and forehead. A tries to keep his eyes open and gives feedback if the blow was too strong or missed. The distance is constantly readjusted between the individual hits: Participant A takes two steps in any direction after each punch, participant B must follow.
Stage 3:
Both participants face each other in a boxing stance. Participant B touches his partner on the forehead with light blows. After participant A has felt the hit, he immediately counters by extending his arm towards participant B's forehead. This verifies whether participant B immediately goes back into cover/the defence position after the blow. After some time, swap roles.
Participant:
1 pair of boxing gloves
Light-Contact: Sensitisation level 4-6
Stimulate circulation
Partner work
Stage 4:
Two punches are connected fluently: From a standing position, competitor B attempts to connect two punches fluently and touch his opponent with both. After the series of punches, competitor A counters by taking one or two steps.
Stage 5:
Multiple punches to a moving target: Competitor A keeps his hands in the basic position and moves slowly and constantly in all directions, but does not actively defend. Participant B tries to touch his opponent as often as possible in succession and connect several punches. From time to time (e.g. after approx. 8 hits), participant A counters to check whether participant B is covered. After some time, the roles are switched.
Stage 6:
Adjust the distance to a fast-moving target and control the (punch) hardness: Participant A is constantly on the move and tries to dodge the punches from participant B using footwork. The defender gives feedback if the punch was too strong. After some time, the roles are switched.
Participant:
1 pair of boxing gloves
Line run
Orienteering
Single run or groups of 2/3
Send participants/groups onto the course in staggered formation (note the distance to the first starter/starting group on the run card)
In the terrain, the sports director distributes controls in advance, which the participants then run to individually or in small groups during the line run. For this purpose, the participants receive a control overview and a running map. The controls are run in numerical order. The line run can be carried out both as an exercise and as a competition. It is worth staggering both variants so that each participant/group has to work independently and cannot simply follow a forerunner/group (note the time intervals/difference to the first start time on the run card for evaluation purposes). The control overview with the running map can either be handed out together with the start signal or distributed to the runners/groups a certain time before the start. For the line run, each participant/group has a defined amount of time to find as many or as many controls as possible.
Variant I:
Prepare the control transfer point: The participants do not receive a map on which the controls are already marked, but must mark the controls themselves at a control transfer point (e.g. using coordinates, azimuth or measuring point method). The control sheets remain at the start even after the transfer. Before the participants set off on the course, the sports director checks the marked controls.
Variant II:
The control that must be approached first is marked on the map. In this variant, the participants can also be sent on the course without staggering, as they do not start in the same direction. However, this varies the running distances (rather unsuitable as a form of competition).
Orienteering controls (to be unplugged)
1 stopwatch
Participant/group:
1 orienteering map with control overview incl. designation (prepared in advance by the sports director)
1 running map form 30.063
1 bussole
Variation of the exercise:
Participant/group:
1 control transfer sheet
1 map scale
1 pencil and eraser
Line run with cube
Increase pulse
Group work
4-6 participants per group
6 lines are defined. The runner whose turn it is rolls the dice. According to the result, he must run to the corresponding line and back again.
Variant:
With two dice. The lower number indicates the repetitions, the higher number the line.
Per group:
1-2 cubes
Line support ball
Stimulate circulation
Group work
2 teams
Both teams try to place the ball behind a defined goal line in the opponent's half of the pitch. A player may run with the ball until an opponent touches him on the back. He must then pass the ball to a team-mate (no throwing). This ball exchange must take place within three seconds, otherwise possession of the ball changes.
Variant:
The participants have one or more game ribbons tucked into their trousers (approx. 2/3 visible). If the ball carrier's ribbon is snatched, he must give the ball to the opposing team.
1 ball (e.g. foam/softball, blitz ball, rugby)
x game ribbons/leashes ►team identification
Participant:
1-3 game ribbons ►Variant
Line drawing
Fighting and roughhousing games
Partner work

Two participants stand opposite each other on a line and grab each other by one hand or forearm. The participants try to pull their opponent over the line. Whoever crosses the line first loses.
Variant:
Whoever has to lift one leg off the ground first loses.
2 marking cones/caps (optional) ►Pitch marking
Post setup:
Caps mark the centre line.